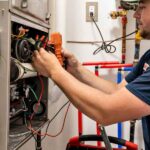
The spring hvac maintenance tips that matter most are the cooling-side checks: swap the air filter, clear the outdoor unit, test the condensate drain, and book a licensed tune-up for the parts you should not touch.
This routine fits a typical ducted air conditioner or heat pump in a U.S. single-family home as cooling season approaches. It covers the DIY layer you can finish in a weekend morning and the contractor layer that protects the expensive parts.
Work through the steps in order, use the pass criteria in each one, and stop at the safety boundaries listed below. That combination turns a vague “spring cleaning” chore into a checklist you can actually finish.
What Spring HVAC Maintenance Covers
Spring HVAC maintenance covers the cooling-side checks that turn an idle system into a season-ready one: filter, outdoor coil clearance, condensate drainage, thermostat, and a contractor check of refrigerant, electrical, and combustion. Do the home layer first, book the licensed layer ahead of the heat.
The ENERGY STAR heating and cooling maintenance checklist, run jointly by the U.S. EPA and the U.S. Department of Energy, frames the same idea as annual pre-season check-ups: have a contractor check the cooling system in the spring and the heating system in the fall. Their checklist runs from thermostat settings and electrical connections through lubrication, the condensate drain, system controls, the starting cycle, and refrigerant and coils on the cooling side.
Timing matters more than people expect. Start three to four weeks before the first sustained heat, not on the day the forecast turns hot. Problems found in April are repairs; problems found in July are emergencies with a two-week waiting list.
Waiting until high heat arrives often results in unexpected cooling breakdowns that require quick intervention. When sudden mechanical issues arise during a heatwave, having access to emergency ac repair in Slidell helps restore indoor comfort quickly before heat levels inside the home become unsafe.
Spring covers the cooling side, and the fall visit covers the heating side.
Preparing your system for seasonal transitions helps maintain indoor comfort throughout the year. While spring focuses heavily on air conditioning checks, ensuring heating components are inspected during routine contractor visits prevents unexpected breakdowns during cold snaps. Addressing minor wear early through a professional Furnace repair service helps keep heating equipment operating safely and efficiently when winter arrives.
For the full cadence behind that split, the breakdown of how often should hvac maintenance be done walks through the schedule in detail.
Spring HVAC Maintenance Tips, Step by Step
The spring checklist is a fixed sequence: gather tools, kill power, test the thermostat, swap the filter, clear the outdoor unit, pour-test the condensate drain, then run a full cooling cycle. Each step below has a pass criterion, so you know when it is done.
Before you start, gather a correctly sized air filter, pruners or a garden hose, a screwdriver, and a cup of water. Read the model number off the outdoor unit nameplate, and confirm the condenser disconnect and the indoor blower breaker before touching anything.
| Step | What to do | Tools / materials | Pass criterion | DIY or pro |
|---|---|---|---|---|
| 1. Kill power | Flip the condenser disconnect and the air-handler breaker off before you work near the equipment | Screwdriver, flashlight | Breaker confirmed off; calling for cooling starts nothing | DIY, always |
| 2. Test the thermostat | Set cooling about 5°F below room temperature and listen for the contactor and fan | Thermostat | System responds within a few minutes with no clicking, grinding, or burning smell | DIY |
| 3. Swap the air filter | Match the old filter size, note the airflow arrow, and install the new element | Correct-size filter, gloves | Filter fits flush; arrow points toward the blower | DIY |
| 4. Clear the outdoor unit | Trim plants back 2 feet, remove debris from the top grille, rinse the fins gently with a hose | Pruners, garden hose | All four sides clear; fins straight and unobstructed | DIY |
| 5. Pour-test the condensate drain | Pour a cup of water down the access tee and watch the drain end | Cup, water | Water exits within a minute; the drain pan does not overflow | DIY |
| 6. Run a full cooling cycle | Let the system run about 15 minutes and confirm airflow, drainage, and sound | 15 minutes of runtime | Even airflow at the registers, water dripping at the drain, no odd smells | DIY observe; pro diagnoses |
| 7. Book the licensed layer | Schedule the contractor for refrigerant, combustion, and electrical checks before demand spikes | Phone | Appointment set two to four weeks before first sustained heat | Pro |
Most failures show up at step 2 or step 6, and both are easy to rush. The thermostat test is the one people skip, then discover in June that the system never starts. On step 6, resist the urge to walk away; the first minutes of a season-first cycle are exactly when a stuck contactor or a loud compressor surfaces. If the breaker trips or the outdoor fan rattles, stop the test and hand the symptom to the tech you were going to call anyway. That is the whole value of testing early: the failure becomes an appointment instead of an emergency.
One habit makes every season easier: photograph the filter size and the unit model number when you finish. By fall you will have forgotten both, and the photos save a trip to the attic.
Air Filter First: The Highest-Impact DIY Step
The air filter is the single highest-impact spring maintenance step: a fresh filter protects the blower and indoor coil and keeps airflow in range. Change it every 90 days in a no-pet home, every 30 to 60 days with pets, and monthly when allergies are the driver.
A dirty filter does more than look bad. It starves the blower of air, drops the coil temperature below freezing, and eventually forms ice on the indoor coil, which shows up as weak airflow and a system that never satisfies the thermostat. The fix costs ten minutes and a filter, so this is where the season is won.
Size matters more than MERV rating. What happens when the filter is 1 inch too long? It crushes against the housing, air bypasses around it, and filtration stops working entirely. Pull the old one out, read the printed dimensions, and buy that exact size before you open the new box.
For the full filter-side routine, including how to match the rating to your blower, the hvac filters maintenance tips guide covers the monthly rhythm. If you are weighing higher-MERV elements for allergies, the tradeoffs are laid out in our hvac filters pros and cons comparison.
Outdoor Unit Clearance and the Condensate Drain
The outdoor unit needs at least two feet of clearance on all sides, and the condensate drain should pass a water-pour test before the season. Both are ten-minute jobs with clear failure signs: restricted airflow and a backed-up drain pan.
Spring growth is the reason this task exists. A shrub that cleared the unit by two feet in March can press against the coil by May, and grass clippings from the first mow get sucked straight into the fins. Trim everything back to the two-foot line now, then sweep the top grille before every mowing weekend.
Two feet on every side. That is the whole job.
For the drain, the pour test is the whole procedure. Find the access tee on the condensate line, usually near the indoor unit or in the attic for a vertical system, and pour in a cup of water. If it exits at the outdoor drain end within a minute, the line is clear. If the drain pan starts to fill, the clog is past the visible tee, which is where DIY ends and a licensed tech with a wet-dry vacuum or a line flush takes over.
Algae and slime grow fastest in warm, dark drain lines, and spring is peak season for them. A slow drain is the early warning; standing water in the pan is the late one, because that water eventually spills over and finds the ceiling below. Mold visible at the drain pan or grilles is a stop point, not a cleaning project.
DIY vs. Licensed Contractor: Where the Spring Work Stops
DIY ends where licensed work begins: refrigerant, gas combustion, high-voltage electrical, and compressor-level repairs are contractor territory. If you smell gas, stop and leave the house; if refrigerant lines feel oily, do not touch them.
| Job | Who does it | Why | Stop signal |
|---|---|---|---|
| Refrigerant pressure and leaks | Licensed tech with EPA Section 608 certification | Handling refrigerant legally requires certification, and lines run at high pressure | Oily film on lines or fittings: do not touch, call a pro |
| Gas furnace burner and combustion | Licensed tech | Combustion testing needs calibrated instruments, and carbon monoxide is odorless | Smell gas: shut the valve, leave the house, call the utility from outside |
| High-voltage electrical parts | Licensed tech | Capacitors hold a lethal charge even with power off at the breaker | Burn marks, buzzing, or a tripping breaker: shut off at the panel and call |
| Compressor or motor replacement | Licensed tech | Compressors need refrigerant recovery and specialized tools | Loud grinding or a compressor that trips the breaker repeatedly |
| Mold or water damage in ducts | Licensed tech or remediation specialist | Mold work needs containment, so spores do not spread through the house | Visible mold at grilles or a musty odor that survives cleaning |
| Condensate clog past the visible tee | Licensed tech | Snaking lines in walls can damage them if done wrong | Drain pan overflows during the pour test |
The line between the two layers is certification and tools. Refrigerant and combustion work is regulated, and high-voltage parts can injure even an experienced homeowner. When the stop signal appears, the cheap move is a diagnostic visit, not a DIY attempt.
On refrigerant specifically, the rules vary by state, but the federal floor is the same everywhere: only EPA-certified technicians may handle refrigerant. A homeowner who vents refrigerant to the air breaks federal law and risks a fine, so the boundary is not optional.
What a Professional Spring Tune-Up Includes
A professional spring tune-up runs about one to two hours and typically costs $100 to $350 depending on your market, covering refrigerant pressure, electrical connections, combustion, drainage, thermostat, and a full-cycle test.
The visit follows a fixed checklist rather than a quick glance. Expect the contractor to check the refrigerant charge with gauges, torque the electrical connections, inspect the burner or heat exchanger on gas systems, verify the condensate drain, and run the system through a complete cycle while measuring temperature drop across the coil.
Prices vary by market. The Trane seasonal guide puts professional maintenance in the $100 to $350 range, and budget markets often land below that; some utilities also offer rebates or discounted checks, so a five-minute call to your provider is worth it before you book.
Regional differences in weather patterns and humidity can also influence local service costs and scheduling needs. Homeowners arranging maintenance for hvac in Gainesville often prioritize early coil checks and humidity control adjustments to keep cooling systems running smoothly through humid summers. Evaluating these regional factors early helps ensure your system stays balanced before severe temperature swings put extra strain on critical mechanical components.
Ask for the price before the visit, and ask what the fixed price covers, because “tune-up” means different things at different shops.
The broader Home Improvement guides on this site cover filter comparisons and the maintenance cost breakdown in more depth, if you want to budget before the tech arrives.
Spring HVAC Maintenance FAQ
Do I need to do anything to my AC unit in the spring?
Yes, give your AC the same pre-season checks it needs every spring: swap the air filter, clear two feet around the outdoor unit, pour-test the condensate drain, and run a test cycle before the first heat wave. Book a licensed tech for the refrigerant, electrical, and combustion checks.
What is the 3-minute rule for air conditioners?
After shutting an air conditioner off, wait at least three minutes before turning it back on. The pause lets the refrigerant pressures equalize and protects the compressor from short-cycling, which is the fastest way to wear one out.
What is the $5,000 rule for HVAC systems?
The $5,000 rule is an industry rule of thumb: multiply the system’s age in years by the repair cost, and if the result exceeds $5,000, replacement is usually the better call than another repair. It is a heuristic, not a law, and your climate and equipment condition still matter.
How often should I change my HVAC air filter in the spring?
Every 90 days in a no-pet home, every 30 to 60 days with pets, and monthly when allergies or heavy dust are factors. If you are troubleshooting airflow or smell issues, the common hvac filters problems list covers what a neglected filter actually does.
When should I schedule spring HVAC maintenance?
Three to four weeks before the first sustained heat, so April in most of the U.S. and earlier in the South. Early bookings beat the rush, and spring hvac maintenance tips like this checklist work best when the system has not been stressed yet.
The season is a success when each DIY step passes its criterion: fresh filter, two-foot clearance, a drain that pours through, and a thermostat that answers. The rest gets booked rather than attempted. Set the fall reminder now, because the fall hvac maintenance tips flip this same checklist to the heating side.
Last modified: October 6, 2026