Fall HVAC maintenance tips come down to a short list of checks you run before the first cold stretch: swap the air filter, test the thermostat, clear the outdoor condenser, verify your carbon monoxide alarms, and close the obvious drafts. Done in September or early October, the whole list takes an afternoon.
They matter most for homes with a central furnace, a heat pump, or a boiler, because the equipment that carried you through summer starts its heaviest workload in November. A filter clogged from months of air conditioning, a condenser ringed with leaves, or a dead CO battery all turn into bigger problems the week the temperature drops.
You do not need a specialty toolbox or a certification for most of it. You do need to know which two or three jobs belong to a licensed technician, because fall is exactly when heating failures get expensive.
What Fall HVAC Maintenance Requires
Fall maintenance needs one clean air filter in the right size, a few basic tools, and a clear stopping rule: anything touching gas, refrigerant, or live wiring is a technician’s job, not yours.
Before you start, confirm three prerequisites. First, the system’s power shutoffs are reachable: the furnace switch, the breaker panel, and the condenser disconnect. Second, you know your filter size, printed on the old filter’s cardboard frame. Third, the outdoor condenser sits clear enough to work around on all four sides.
Tools for the DIY half are modest:
- Correct-size air filter, plus a marker to note the install date on the frame
- Garden hose and a soft brush for the condenser fins
- Pruners for vegetation around the condenser
- Vacuum with a brush attachment for registers and vents
- New batteries for carbon monoxide detectors
- Weatherstripping, caulk, and a door sweep for drafts
The professional half is one job: an annual tune-up on a gas furnace, heat pump, or boiler, typically $100 to $350 in most U.S. markets before any repairs. A technician checks combustion, the heat exchanger, the blower, and the safety controls.
The Fall HVAC Maintenance Tips Workflow, Step by Step
Work in this order: filter, thermostat, condenser, vents, CO alarms, drafts, then the annual tune-up. Each step has a pass criterion you can verify before you move on.
1. Swap the air filter
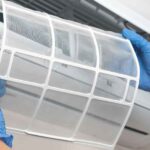
Turn the furnace or air handler off at its service switch first. Slide the old filter out and note its size, then insert the new one with the airflow arrow pointing toward the blower.
Failure point: a filter installed backwards still fits, and it blocks airflow almost as badly as a dirty one.
Pass criterion: the element sits flush with no gaps, and the arrow points at the blower.
2. Test the thermostat
Set the thermostat a few degrees above room temperature and listen. The furnace or heat pump should start within a minute or two, with warm air at the registers shortly after.
Failure points: no response, a clicking contactor, or a burner that cycles on and off.
A smell of burning dust on the first run is normal; any odor that persists past a few minutes is a reason to shut the system down and call a technician.
3. Clear the outdoor condenser
Flip the condenser disconnect to off. Remove leaves and debris from the top grille, trim vegetation back, and rinse the fins gently with a hose, working from the inside out.
Failure point: a high-pressure nozzle bends the aluminum fins and reduces airflow.
Pass criterion: two feet of clear space on all four sides, straight fins, and no debris on the grille.
Covering the condenser for winter is optional. If you use a cover, install it dry and remove it before the first cooling run in spring; a cover that traps moisture invites mold on the coils.
In warmer coastal climates where cooling systems operate far into autumn, routine coil checks and seasonal tune-ups become even more critical for long-term equipment reliability. Homeowners seeking reliable ac repair in Sarasota often schedule professional evaluations before seasonal transitions to catch minor electrical or mechanical wear early, helping maintain steady indoor comfort and lower monthly utility demands.
4. Check vents and returns
Walk the house and confirm every register and return is open and unblocked by furniture, rugs, or curtains.
Vacuum the grilles and the floor around them.
Failure point: closing vents in unused rooms to “save energy.”
That raises static pressure in the ductwork and can strain the blower, and the savings are usually nil.
5. Test carbon monoxide detectors
Press the test button on every alarm until it sounds, then replace batteries in battery-powered units.
Note the expiration date printed on each unit; CO sensors have a finite life, commonly five to ten years, and an expired alarm must be replaced, not just retested.
Pass criterion: a loud, steady alarm from each unit, and a fresh battery.
Install alarms on every level and outside each sleeping area, per EPA carbon monoxide guidance.
6. Seal the drafts
Run a hand around window and door frames on a windy day and mark where air moves. Add weatherstripping to movable parts, caulk fixed joints, and fit a door sweep under exterior doors.
Failure point: sealing a room that has no return vent, which starves the system of airflow.
Seal for comfort, but never block the path air needs to get back to the furnace.
7. Book the professional tune-up
Schedule the annual heating tune-up before cold weather, not during it.
For gas equipment, the technician should test combustion and inspect the heat exchanger, flue, and safety controls, and give you a written report.
Pass criterion: a completed inspection you understand, with any flagged issues itemized. If a technician cannot show you what was checked, treat the report as incomplete.
Local service listings and regional HVAC business profiles can provide quick access to customer feedback and service details when scheduling maintenance. Reviewing local listings before booking makes it easier to verify technician qualifications, compare standard tune-up checklist items, and click to visit regional contractor resources for reliable seasonal support.
| Task | Tools / materials | Pass criterion | DIY or pro |
|---|---|---|---|
| Swap air filter | Correct-size filter | Arrow toward blower; frame flush | DIY |
| Test thermostat | None | Heat starts within 1-2 minutes; no persistent odor | DIY |
| Clear condenser | Pruners, hose, soft brush | 2 ft clear on all sides; fins straight | DIY |
| Check vents | Vacuum, brush attachment | All registers open; grilles clean | DIY |
| Test CO alarms | New batteries, cloth | Audible alarm; date not expired | DIY |
| Seal drafts | Weatherstripping, caulk, door sweep | No detectable air movement at frames | DIY |
| Annual tune-up | None (booked) | Written inspection report; combustion tested | Pro |
Filter Care: The Highest-Impact Task
The filter is the cheapest part you own, and the one most likely to be ignored through the cooling season. A clean element protects the blower and heat exchanger; a clogged one restricts airflow, raises energy use, and can overheat a furnace.
Check the filter monthly and replace it on a schedule that fits your household. ENERGY STAR’s general guidance is to check filters monthly and change them every one to three months; homes with pets or allergy sufferers fall at the short end of that range.
| Household type | Change frequency (typical) |
|---|---|
| No pets, no allergies | At least every 90 days |
| One or more pets | Every 30-60 days |
| Allergy or asthma sufferers | Every 30 days for 1-inch filters; 60-90 days for thicker filters |
Two failures cause most filter-related problems. The first is the wrong size: a filter that is slightly too small lets unfiltered air bypass it and carries dust into the blower. The second is a higher MERV rating than the system can push air through; a denser filter protects better but restricts flow more, so match the rating to what the equipment’s blower can handle.
For the deeper questions, like which MERV rating fits your equipment or when a monthly change is genuinely worth it, the guide to hvac filters maintenance tips works through sizes, ratings, and replacement timing in detail.
Safety Boundaries: When DIY Stops and a Pro Starts
Gas combustion, sealed refrigerant circuits, and high-voltage wiring are off-limits for homeowners. Act on these signs immediately: a sounding CO alarm, a burning smell that persists, a furnace that will not light, or visible rust or cracks on a heat exchanger.
Carbon monoxide comes from incomplete combustion, and the danger cases are specific: a cracked heat exchanger or a blocked flue can push it into living spaces instead of outside. That is why the CO alarm test is a maintenance task rather than an optional extra, and why any alarm that sounds should be treated as an emergency, not a nuisance.
Refrigerant belongs to the same rule. A cooling system that underperforms in late summer often has a refrigerant leak, but only a licensed technician may open the sealed circuit. The same goes for anything behind the electrical panel or inside the gas valve.
The boundary list, stated plainly:
- You may: change filters, clean the condenser exterior, test alarms, seal drafts, and verify vents.
- You may not: open the refrigerant circuit, work on gas valves or burners, remove the furnace access panels for wiring, or climb onto steep roofs to service equipment.
- Stop and call a pro when: a CO alarm sounds, the furnace produces a persistent burning smell, you see soot or rust around the burner compartment, or the system trips breakers.
When in doubt, the tune-up you were going to book anyway is the right place to raise the question. A technician who sees the unit in person can separate a worn part from a failed one, which is the difference between a small repair and a mid-winter emergency.
The Fall Checkpoint List
Before the first cold night, confirm each item in order: a fresh filter, a thermostat that starts heat within two minutes, a condenser clear on four sides, open vents, tested CO alarms, and a tune-up booked with a written report.
Run this list once, on a dry weekend in early fall.
The filter swap takes five minutes, the condenser another ten, and the rest is mostly walking the house.
One last check that most lists leave out: note the install date on the new filter’s frame. Three months later, when the first freeze hits and the furnace struggles, that date is the fastest way to rule the filter in or out.
Fall HVAC Maintenance Tips FAQ
What is the 20 degree rule for HVAC?
It is a cooling-season rule of thumb: the supply air temperature should sit about 15 to 20 degrees Fahrenheit below the return air temperature when the AC runs. A much smaller split usually points to a clogged filter, low refrigerant, or a failing compressor, which a technician should diagnose.
What is the $5000 rule for HVAC systems?
It is a rough replacement decision rule, not a law: if the repair quote approaches $5,000, or the equipment is older than 10 to 15 years and the repair would cost more than half its replacement value, replacing the unit usually beats another repair. Get a second quote before committing either way.
Is 72 a good temperature for heat in the fall?
The U.S. Department of Energy recommends 68°F while you are awake at home in winter, with the thermostat set back 7 to 10 degrees for eight hours a day, which it estimates saves around 10 percent on heating. 72°F keeps you comfortable, but every degree above that target raises the bill.
What is the most overlooked home maintenance task?
From an HVAC perspective, it is the monthly filter check and the drain line from the indoor coil. Both are free to inspect, both fail quietly for months, and both cause expensive repairs when ignored through a season.
Fall HVAC maintenance tips earn their keep in October, not December. Do the filter, the thermostat, the condenser, the alarms, and the drafts now, book the tune-up before the rush, and the first real cold week becomes a routine start rather than an emergency call.
Last modified: October 6, 2026