The overflow tube is the vertical plastic pipe in the center of the toilet tank. It prevents the tank from overflowing if the fill valve fails. It is part of the flush valve assembly, the larger unit that includes the flapper seat and the opening that releases water into the bowl. A cracked or broken overflow tube cannot be replaced on its own. The entire flush valve must be replaced. The job requires removing the tank from the bowl and costs $15 to $30 for the part. It takes an hour.
A cracked overflow tube is rare. It happens when the tank is struck during a previous repair, when old plastic becomes brittle, or when a cleaning tablet placed in the tank corrodes the plastic over time. The symptom is continuous water running into the bowl, even after the flapper has been replaced, because water is leaking through the crack in the overflow tube, not past the flapper. Here is how to replace the flush valve assembly and put the toilet back together.
First: Confirm the Overflow Tube Is Cracked
A running toilet that is not fixed by a new flapper may have a cracked overflow tube. The water level in the tank appears normal, below the top of the overflow tube, yet water continues to run into the bowl. The flapper is sealing against the flush valve seat. The water is not going over the top of the overflow tube. The water is leaking through a crack or a split in the tube itself, below the water line.
To confirm, add a few drops of food coloring to the tank water. Do not flush. Wait 15 minutes. If colored water appears in the bowl and the water level in the tank is below the top of the overflow tube, the tube has a crack below the water line. The food coloring traces the leak path. A flapper leak shows color entering the bowl from the flush valve opening. An overflow tube crack shows color entering from below the water line in the tank, seeping through the tube wall.
A crack in the overflow tube is not repairable. Epoxy and silicone do not bond reliably to the plastic used in toilet tanks, and the crack will reopen. Replace the flush valve assembly.
Step One: Remove the Tank From the Bowl
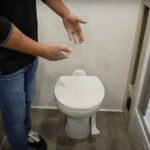
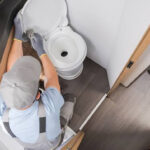
Turn off the water at the shutoff valve behind the toilet. Flush the toilet and hold the handle down to drain as much water as possible from the tank. Sponge out the remaining water from the bottom of the tank. Disconnect the water supply line from the fill valve under the tank. Unscrew the nut by hand.
The tank is held to the bowl by two or three bolts. Remove the plastic caps covering the bolt heads inside the tank. The bolts have a slotted head inside the tank and a nut underneath the bowl. You need two wrenches: one inside the tank to hold the bolt head, and one underneath the bowl to turn the nut. The bolts are often rusted. Penetrating oil sprayed on the nuts 10 minutes before you start helps loosen them. If a bolt spins without loosening, the bolt head slot inside the tank is stripped. Grip the bolt head with locking pliers from above, hold it steady, and turn the nut from below.
Remove the nuts and washers. Lift the tank straight up and off the bowl. The large tank-to-bowl gasket may stick to the bowl or stay with the tank. Set the tank on its side on a towel or a piece of cardboard. The bottom of the tank will have residual water.
Step Two: Remove the Old Flush Valve
The flush valve is the assembly in the center of the tank bottom. It includes the overflow tube, the flapper seat at the base, and the threaded body that passes through the tank. The flush valve is held in place by a large lock nut on the outside bottom of the tank. Unscrew the lock nut. It is a thin plastic nut, typically 2 to 3 inches in diameter. A large adjustable wrench or channel-lock pliers will turn it. If the nut is too tight or too large for your tools, a flathead screwdriver tapped against one of the ridges on the nut with a hammer can break it loose. Turn counterclockwise.
Once the lock nut is removed, the flush valve lifts out from inside the tank. The old tank-to-bowl gasket on the bottom of the flush valve may come with it or may remain stuck to the tank. Remove it and discard it. Clean the area around the flush valve opening on the inside and outside of the tank. Remove any old gasket material, mineral deposits, or debris. The new gasket must seal against a clean surface.
Step Three: Install the New Flush Valve
Buy a universal flush valve kit. The kit includes the flush valve body with the overflow tube, the flapper, the tank-to-bowl gasket, and the lock nut. The overflow tube height is adjustable on most universal kits. Slide the overflow tube to the correct height and lock it in place. The top of the overflow tube must be approximately 1 inch below the hole for the flush handle and approximately 1/2 inch below the top of the tank at the fill line. The fill valve, when adjusted correctly, should fill the tank to a level approximately 1/4 inch below the top of the overflow tube. If the overflow tube is too short, the tank cannot fill to the correct level. If it is too tall, the flush handle lever will hit it.
Install the new flush valve from inside the tank. The threaded body of the flush valve passes through the hole in the bottom of the tank. The large rubber or foam gasket goes between the flush valve and the inside of the tank. The gasket is tapered. The wide side faces down into the hole. The beveled side faces up toward the flush valve. Thread the lock nut onto the flush valve body from outside the tank. Tighten the lock nut by hand, then an additional quarter to half turn with a wrench. Overtightening cracks the plastic lock nut or the tank. The gasket creates the seal. The lock nut holds the gasket in compression. The lock nut does not create the seal by itself.
Step Four: Reinstall the Tank on the Bowl
Install the new tank-to-bowl gasket that covers the large opening on the bottom of the flush valve. The tapered side of the gasket faces down toward the bowl. Insert the new tank bolts through the holes in the bottom of the tank from the inside. Each bolt gets a rubber washer under the bolt head inside the tank. A thin bead of silicone caulk under each rubber washer provides additional sealing. The metal washer goes under the nut outside the bowl.
Lift the tank and position it over the bowl. The bolts must align with the holes in the bowl. Lower the tank slowly. The large gasket must seat squarely on the bowl inlet. Thread a metal washer and a nut onto each bolt from underneath the bowl. Tighten the nuts by hand, then with a wrench in an alternating pattern, a quarter turn at a time. Stop when the tank is snug and does not rock. The gap between the tank and the bowl should be even on all sides. Overtightening cracks the porcelain.
Reconnect the water supply line to the fill valve. Turn the water on slowly. Check for leaks at the tank-to-bowl connection, the flush valve lock nut, and the supply line as the tank fills. Flush the toilet several times. Check for water around the base of the bowl and at the tank bolts. The new flush valve includes a new flapper. Connect the flapper chain to the flush handle lever with approximately 1/2 inch of slack. Too much slack prevents the flapper from lifting fully. Too little slack holds the flapper open and the toilet runs continuously.
Frequently Asked Questions
Will a universal flush valve fit my toilet?
Most universal flush valves fit standard 2-inch flush valve openings. Measure the diameter of the flush valve opening in the bottom of the tank before buying the replacement. A 2-inch opening is standard. Some older toilets and some high-performance toilets use a 3-inch flush valve. The universal kit packaging specifies the opening size it fits. A 3-inch flush valve requires a 3-inch replacement kit.
Why can I not just replace the overflow tube separately?
The overflow tube is molded as part of the flush valve body on most toilets. On some older models, the overflow tube threads into the flush valve base and can be replaced separately. On most toilets manufactured in the last 30 years, the tube and the flush valve body are a single piece. Even if the tube were a separate part, the labor to remove the tank and access the flush valve is the same whether you replace the tube alone or the entire flush valve. Replacing the entire assembly while the tank is off is good insurance against the flush valve seat or gasket failing next year.
The new flush valve leaks at the lock nut. How do I fix it?
Drain the tank. Tighten the lock nut slightly. The leak is between the gasket and the tank, not at the threads. Tightening the lock nut compresses the gasket further. If the leak continues, the gasket is not seated correctly or debris is trapped between the gasket and the tank. Remove the flush valve, clean the gasket and the tank surface, and reinstall. If the lock nut is cracked from overtightening, it cannot compress the gasket evenly. Replace the lock nut or the entire flush valve if the nut is not sold separately.
Last modified: June 18, 2026