Ductless mini-split heat pumps can solve comfort problems in homes without ductwork, finished basements, or added rooms that never quite match the rest of the house. In Kaysville, UT, summer heat, winter cold snaps, and snow load put extra demands on where each indoor air handler sits, how the outdoor condenser is mounted, and how the line set and condensate drain are routed. Thoughtful planning before installation pays off with steadier temperatures, quieter operation, and fewer compromises in day-to-day use. This guide walks through how to define your zones, size indoor units, choose mounting locations, and plan the path for refrigerant, power, and drainage so the system performs well in Northern Utah’s climate.
1. Define zones by how you actually use the space.
A “zone” in a ductless system is tied to a single indoor air handler and the area it can realistically serve with doors in their normal positions. If you are comparing options for ductless installation in Kaysville, UT, start by listing rooms that run hot or cold, how often they are occupied, and whether doors typically stay open. A split level with a closed-off bedroom wing may benefit from two smaller heads rather than one larger unit in a hall. In contrast, an open kitchen/living area often works as a single zone because airflow can reach the entire space without doorways blocking it.
Consider a basement office that doubles as a guest room a few weekends a year. A dedicated head there lets you keep it at 68 degrees for work without overcooling the main floor. By comparison, trying to push air from a family room unit around a corner, down a stairwell, and through a partially closed door usually disappoints. Expecting one head to condition three separated rooms is a common mistake; indoor units move air, not magic. If privacy or doors limit airflow, create more zones.
2. Right-size each head for Kaysville conditions.
Capacity (in BTU/h) should reflect each room’s heating and cooling load. Square footage matters, but so do insulation levels, window size and orientation, ceiling height, and air leakage. Oversizing seems safe, but it can lead to short cycling, temperature swings, and poorer humidity control in summer. Inverter-driven compressors can modulate, but they still work best when heads match the load. For winter comfort along the Wasatch Front, look at cold-climate ratings and low-ambient performance along with SEER2 and HSPF2; the goal is steady heat output without relying on electric space heaters when temperatures dip.
Picture two spaces: a south-facing sunroom with large glass and a small, north-facing bedroom. The sunroom’s cooling peak arrives in late afternoon, so its head may need higher BTUs to handle solar gain, while the bedroom can often use a smaller unit that runs longer and quieter. If you’re torn between sizes, a slight bump paired with a variable-speed inverter can be reasonable for the sunroom, while the bedroom benefits from staying conservative. Improving weatherstripping, adding shades, or air sealing can reduce required capacity in either room and save on equipment size.
3. Mount indoor air handlers where airflow actually helps
Wall-mounted air handlers work well on an interior wall that allows a straight, protected line-set path to the outdoors. Give the unit the clearances listed by its manufacturer so it can take in return air and throw supply air across the room. Avoid tucking it over a doorway or right above a thermostat or range where heat or drafts confuse sensors. Aim the louver so air sweeps the room’s center rather than blasting a sofa or bed. Ceiling cassettes can be great in larger open rooms with high ceilings, but they require attic access and careful condensate management.
Think about service and condensate routing before you pick a spot. Filters should slide out without climbing a ladder over a stairwell. Condensate drains need a continuous downward slope to a safe discharge; if gravity won’t cooperate, a small condensate pump can help, but it adds noise and maintenance. A drain running through an unheated garage or crawlspace can freeze in winter, so route and insulate it accordingly. Minor placement changes now can prevent rattles, drips, and nuisance alarms later.
4. Place the outdoor condenser for winter airflow and access.
In Kaysville, outdoor units must breathe in summer and shed frost in winter. Pick a location with open airflow and room to access service panels. Mounting on a wall bracket keeps the condenser above typical snow accumulation and away from drifting debris. A ground pad works too if you plan for snow clearance and drainage so defrost meltwater does not refreeze across a walkway. Keep the unit away from bedroom windows if nighttime sound is a concern, and check HOA or setback rules before finalizing the site.
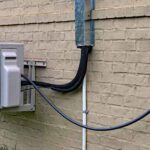
Shorter, straighter line sets generally mean less exposure and slightly better efficiency than long, looping runs. Protect the refrigerant lines and control cable with UV-resistant insulation and line-hide covers. Keep bends gentle and penetrations sealed with appropriate sleeves and flashing so wind and water stay out. The outdoor location also drives your electrical plan: most installations need a dedicated circuit sized for the equipment and a service disconnect within sight of the condenser, typically arranged by a licensed electrician under local code.
Plan the line set, drain, and power route before drilling.
Walk the full path for refrigerant lines, drain, and wiring from each head to the condenser before anyone bores holes. Avoid hidden plumbing, wire bundles, and structural members. Brick, stone, or retrofit stucco often requires a wall sleeve; closets or corner chases can hide vertical runs neatly. Outside, keep lines tight to the wall, use matching covers, and seal all penetrations against wind-driven rain. Professional crews pressure test with nitrogen and pull a deep vacuum before releasing refrigerant; good routing and clean terminations make those steps faster and more reliable.
After installation, small habits protect performance. Rinse or vacuum washable filters on each indoor unit regularly during peak season, and keep supply airflow clear of tall bookcases or drapes. Clear leaves from the outdoor coil, and keep snow from blocking the base in winter so defrost cycles work as designed. Check or flush the condensate line at season change, especially if you have a pump. If you will rely on the system for primary heat, a preseason check by a qualified technician can confirm sensors, defrost logic, and backup heat settings are ready for cold weather.
Thoughtful zoning and placement turn ductless equipment into a precise comfort tool, not a compromise. Sketch your floor plan, note where doors usually sit, track sun exposure and window sizes, and list any noise-sensitive rooms. Discuss low ambient heating capability, base pan heater availability, filter access, and outdoor clearances before committing to exact locations. With zones defined by how you live, heads sized to the actual loads, and a clean plan for line sets, drains, and power, your mini-split will be better prepared for July heat and January cold across Kaysville.
Last modified: September 1, 2026