The toilet has been running for months. You replaced the flapper. The toilet still ran. You replaced the fill valve. The toilet still ran. You adjusted the water level, the chain, and the float. The toilet still ran. The problem is the flush valve. The plastic seat that the flapper seals against has a hairline crack, or the overflow tube has separated from the valve body, or the gasket under the flush valve has disintegrated. Water is leaking through the flush valve assembly itself, which means no amount of flapper replacement will ever fix it.
Replacing a toilet flush valve is the most involved toilet repair that is still within reach of a homeowner. It requires removing the tank from the bowl. It requires a new tank-to-bowl gasket, because the old one cannot be reused. It requires working carefully with porcelain that will crack if a bolt is overtightened. The parts cost $20 to $30. The repair takes about an hour. This guide covers the full sequence, including the part where water that has been sitting in the bottom of the tank for years finally gets released onto your bathroom floor.
What the Flush Valve Does and Why It Fails
The flush valve is the large plastic assembly in the center of the tank. It consists of the flapper seat, a raised ring that the flapper seals against, and the overflow tube, a vertical pipe that prevents the tank from overflowing if the fill valve fails. The entire assembly threads into the bottom of the tank through a large opening directly above the bowl. A thick rubber or foam gasket seals the connection between the flush valve and the inside of the tank.
Flush valves fail in three ways. The flapper seat develops cracks or chips that prevent the flapper from sealing. The gasket under the valve degrades and water leaks through the tank into the bowl continuously. The overflow tube separates from the valve body at the seam. All three failures produce a running toilet. None of them are fixable without replacing the flush valve assembly.
Step 1: Remove the Tank from the Bowl
Turn off the water supply at the shutoff valve behind the toilet. Flush the toilet and hold the handle down to drain the tank. Disconnect the water supply line from the fill valve shank under the tank. Soak up the remaining water in the bottom of the tank with a sponge and wring it into the bowl.
The tank is attached to the bowl by two or three bolts that pass through the bottom of the tank and through corresponding holes in the bowl. The bolt heads are inside the tank, covered by rubber washers. The nuts are underneath the bowl, typically hidden behind plastic covers. Use a screwdriver inside the tank to hold the bolt head stationary while you turn the nut underneath with a socket wrench. If the bolts are rusted and the nuts will not turn, cut the nuts off with a hacksaw blade. Replacement bolts are included with most flush valve kits.
Once the nuts are removed, lift the tank straight up off the bowl. The tank is heavy but manageable, about 30 to 40 pounds. Set it down on a drop cloth or a piece of cardboard on the floor. Do not set the tank directly on tile. Porcelain on tile contact breaks one of them. The old tank-to-bowl gasket, a large foam or rubber ring, will be stuck to the bottom of the tank or the top of the bowl. Peel it off and discard it. It is not reusable.
Step 2: Remove the Old Flush Valve
With the tank on its side or upside down on the drop cloth, locate the large plastic lock nut on the outside bottom of the tank that holds the flush valve in place. The nut is 2 to 3 inches in diameter. Unscrew it by hand or with channel-lock pliers. Turn counterclockwise.
Once the nut is off, lift the old flush valve out of the tank from the inside. The valve body pulls straight up and out. Discard the old valve and the old gasket. Inspect the inside of the tank around the flush valve opening. If there is mineral buildup or old gasket residue, clean it with a cloth and white vinegar. The new gasket must seat against clean porcelain.
Step 3: Install the New Flush Valve
The new flush valve comes with a thick rubber gasket, a plastic lock nut, and a new flapper. The valve height may be adjustable. Most new flush valves allow the overflow tube height to be set by twisting the tube section to unlock, sliding it to the correct height, and twisting to lock.
Set the height so the top of the overflow tube is about 1 inch below the top of the tank. If the tube is too tall, the tank lid will not close. If the tube is too short, the water level will be too low and the flush will be weak. Measure before installing. The tank interior height minus 1 inch is the correct overflow tube height.
Slide the rubber gasket onto the threaded shank of the flush valve. Insert the valve through the opening in the bottom of the tank from the inside. The gasket sits between the valve body and the inside of the tank. Thread the plastic lock nut onto the shank from outside the tank. Hand-tighten, then a half-turn with pliers. The gasket creates the seal. The nut compresses the gasket. Overtightening cracks the plastic nut or the porcelain tank. Tighten until the gasket is compressed and the valve does not rotate by hand.
Install the new flapper on the flush valve seat. Hook the rubber ears onto the pegs on either side of the valve body. Attach the chain to the flush handle arm with half an inch of slack.
Step 4: Reinstall the Tank on the Bowl
Install the new tank-to-bowl gasket on the large opening at the bottom of the flush valve. The gasket is centered over the opening and will compress between the tank and the bowl when the tank is tightened down. If the gasket has a beveled side, the bevel faces downward into the bowl opening.
Insert new tank-to-bowl bolts through the holes in the bottom of the tank from the inside. The bolt heads go inside the tank with rubber washers under them. The rubber washers seal the bolt holes. Without them, water leaks out around the bolts.
Lift the tank and position it over the bowl, aligning the bolts with the holes in the bowl. Lower the tank straight down. The tank-to-bowl gasket must seat centered on the bowl opening. Thread the nuts onto the bolts from underneath and tighten by hand. Then tighten with a socket wrench, alternating sides a few turns at a time. The tank should draw down evenly. Do not tighten one side fully before starting the other. Uneven tightening tilts the tank and the gasket will not seal.
The nuts should be snug, then a quarter-turn past snug. Overtightening cracks the porcelain tank or bowl. After tightening, the tank should not rock. If it rocks, the gasket is not seated or the bolts are unevenly tightened. Loosen, reposition, and retighten.
Step 5: Reconnect the Water and Test
Reconnect the water supply line to the fill valve shank. Turn the water supply on slowly. Let the tank fill. Watch the tank-to-bowl connection for leaks. A dry paper towel pressed against the seam between the tank and the bowl reveals seepage that is invisible to the eye.
Flush the toilet. Watch the tank bolts for drips. Watch the base of the toilet for water. Check the flush valve gasket from inside the tank by looking at the flapper area during a flush. If everything is dry, the repair is complete. If the tank leaks at the bolts, tighten the nuts slightly. If the tank leaks at the gasket between the tank and bowl, the gasket is not seated. Drain the tank, loosen the bolts, reposition the gasket, and retighten.
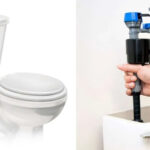
While the Tank Is Off: Replace the Fill Valve Too
The flush valve and the fill valve share the same service life. If the flush valve has failed and the fill valve is original to the toilet, replace the fill valve at the same time. The fill valve costs $12 and takes an extra five minutes to swap while the tank is off the bowl. Replacing both eliminates the possibility of the fill valve failing six months from now and requiring a second tank removal.
Frequently Asked Questions
Are flush valves universal, like fill valves?
Most standard flush valves are interchangeable, but the size must match. Flush valves come in 2-inch, 3-inch, and 4-inch diameters. The size is the diameter of the flapper opening, not the overall valve body. A 3-inch flush valve requires a 3-inch flapper. Take the old flush valve to the hardware store to match the size. Kohler and Toto use proprietary flush valves in some models. If the toilet is from one of these brands, check the manufacturer’s parts diagram before buying a universal replacement.
What if I crack the tank while tightening the bolts?
Stop immediately. A cracked tank cannot be repaired. It must be replaced. The tank is porcelain and cannot be patched with epoxy in a way that will hold water under pressure. Replacement tanks for current-model toilets are available from the manufacturer. For older or discontinued toilets, the entire toilet must be replaced. This is why the instructions emphasize finger-tight plus a quarter-turn, not wrench-tight. Porcelain does not flex. It cracks without warning.
Should I use a foam or rubber tank-to-bowl gasket?
Use whichever material comes with the flush valve kit. Foam gaskets compress more easily and are more forgiving of minor misalignment. Rubber gaskets last longer but require more precise alignment to seal. If the kit includes a foam gasket, use it. If you are buying the gasket separately and have a choice, foam is the better option for a DIY installation because it tolerates slight unevenness in the tank or bowl surface.
The Tank That Finally Stops Running
A flush valve replacement is the last resort in toilet repair. It is the part you replace after the flapper and the fill valve have both failed to fix the problem. It is more work than either of those replacements because the tank must come off. But it is still an hour of work and $25 in parts. The alternative is replacing the entire toilet, which is also an hour of work and $150 in parts, so the flush valve replacement is worth attempting first.
If the flush valve is cracked, the toilet was going to run forever regardless of what else you replaced. Now it will not. The frustrating months of intermittent hissing are over. The tank is silent. The water bill goes back to normal. The only thing better than fixing a running toilet is the silence that follows.
Last modified: June 18, 2026