The flush handle broke on a Tuesday morning. The plastic arm inside the tank snapped clean off, and now there is a loose chrome lever dangling from the side of the toilet with nothing connected to it. You have been reaching into the tank and pulling the chain by hand for two days, which works but makes you feel like you are living in a rental that the landlord has abandoned.
Replacing a toilet flush handle is the easiest toilet repair there is. Ten minutes, one wrench, and an $8 part from the hardware store. No water needs to be shut off. No tank needs to be drained. The only thing standing between you and a functioning toilet is a reverse-threaded plastic nut that confuses people who have never encountered one.
This guide covers the universal replacement steps, the one threaded part that tightens the wrong way, and how to adjust the chain so the flapper lifts fully without leaving so much slack that the handle jiggles like a loose tooth.
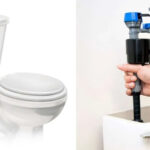
What You Are Replacing and What to Buy
A toilet flush handle assembly has three parts: the external lever you push, a plastic or metal arm inside the tank that the lever rotates, and a chain or lift wire connecting that arm to the flapper at the bottom of the tank. When any of these three fails, the toilet does not flush properly.
The most common failure is the plastic arm inside the tank snapping. Older toilets used metal arms that corrode and eventually break at the pivot point. Newer toilets use plastic arms that become brittle over years of submersion in cold water and snap under normal use.
Buying the right replacement:
- Universal flush handles ($6-12) fit most toilets made in the last 30 years. They include an adjustable arm and multiple mounting options. This is what you want unless your toilet is very old or very unusual.
- Brand-specific handles ($15-30) from Kohler, American Standard, or Toto are needed for some toilets with proprietary mounting designs. If the universal handle wobbles loosely in the mounting hole or will not thread in, you need the brand-specific part.
- Front-mount vs. side-mount: most handles mount on the left side of the tank. Front-mount handles sit on the front face of the tank and are common on certain Kohler and Toto models. Confirm which you have before buying.
A detail that saves a return trip: the replacement handle package should include the handle, the plastic nut, the internal arm, and a new chain or clip. If it only includes the external lever and you need the internal arm too, buy a complete kit, not just the handle.
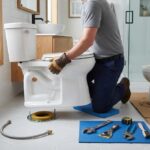
What You Need
- Adjustable wrench or channel-lock pliers
- New flush handle kit
- Flashlight (to see inside the tank)
That is the entire list. No bucket. No towel. You are not touching the water supply. The tank stays full.
How to Replace the Handle: Step by Step
Step 1: Remove the Old Handle
Lift the tank lid and set it on a towel on the floor. The lid is ceramic. It will crack if it tips over. Look inside the tank and locate the plastic mounting nut directly behind the flush handle. The nut threads onto the handle’s shaft from inside the tank.
Here is what confuses first-timers: the nut is reverse-threaded. Turn it clockwise to loosen, counterclockwise to tighten. This is the opposite of standard threading. The reason is that pushing the handle down would gradually unscrew a standard nut over years of use. The reverse thread keeps it tight.
Grip the nut with pliers and turn it clockwise. It will resist briefly, then spin free. Once the nut is off, pull the old handle straight out from the outside. The internal arm and chain will come with it. If the chain is still attached to the flapper, unclip it.
Step 2: Install the New Handle
Slide the new handle into the mounting hole from the outside. On most universal handles, the shaft is square or has flat sides that align with the hole. Rotate the handle until it seats fully flush against the tank.
Thread the new plastic nut onto the shaft from inside the tank, turning it counterclockwise to tighten. Hand-tighten, then give it a quarter turn with pliers. Do not overtighten. The nut is plastic. Cranking it down with all your strength cracks the nut or the tank. A snug fit is enough. The reverse thread will not let it loosen during use.
Step 3: Adjust the Internal Arm Position
Most universal handles come with an adjustable arm. A set screw or a sliding mechanism lets you change the arm’s length and angle. Position the arm so it points toward the flapper chain’s attachment point. The arm should sit roughly horizontal when the handle is at rest.
If the arm is too long, it hits the tank wall before the handle can complete its travel. If it is too short, the chain pulls at an angle and the flapper lifts unevenly. Adjust the length so the arm clears the tank wall by at least half an inch in all positions.
Step 4: Attach the Chain and Set the Slack
Clip the new chain or lift wire to the flapper’s top hole. Most flappers have multiple holes. Use the hole closest to the handle for the most direct pull. Attach the other end to the arm, leaving just enough slack that the chain has about half an inch of play when the handle is at rest.
The chain adjustment is the difference between a toilet that flushes perfectly and one that either does not flush fully or runs constantly. Here is the calibration:
- Too tight: the chain holds the flapper slightly open. Water leaks from the tank into the bowl continuously. You hear the toilet running or the fill valve cycling on and off.
- Too loose: the handle has to be pressed all the way down before the chain catches, or the chain catches on the flapper when it drops, holding it open.
- Correct: the chain has roughly half an inch of vertical slack. The handle moves freely for a small distance before engaging the chain. The flapper lifts fully when the handle is pressed and drops cleanly when released.
If the chain is too long, use the included clip to take up slack rather than knotting the chain. A knot in the chain eventually works loose and the adjustment drifts.
Step 5: Test and Fine-Tune
Replace the tank lid. Flush the toilet. Observe three things:
- The handle moves smoothly and returns to its rest position without sticking.
- The flapper lifts fully and the toilet flushes with normal force.
- After the tank refills, listen for running water. Silence means the flapper is fully seated and the chain is not holding it open.
If the handle sticks in the down position, the arm is binding against the tank wall or the chain is catching on something. Open the tank and watch what happens when you press the handle. The problem will be obvious when you can see it.
When the Simple Fix Does Not Work
If the new handle is installed correctly and the toilet still will not flush, the problem was not the handle. It was the flapper, the fill valve, or the flush valve. Here is how to tell:
- Handle moves freely but nothing happens: the chain has disconnected from the flapper or the arm is not engaging. Open the tank and check the chain connection at both ends.
- Handle is stiff or hard to press: the arm is binding against the tank wall or the mounting nut is overtightened. Loosen the nut slightly and adjust the arm position.
- Toilet flushes but the tank does not refill: the fill valve has failed. This is a separate repair unrelated to the handle.
- Water runs continuously after flushing: the chain is too tight and holding the flapper open, or the flapper itself is worn and not sealing. Check the chain slack first, then inspect the flapper for cracks or warping.
None of these are difficult to fix. But replacing the handle will not solve them, and diagnosing correctly saves you from replacing a part that was not broken.
Frequently Asked Questions
Why is the toilet handle nut reverse-threaded?
The flush handle is pushed downward to flush. On a standard right-hand thread, pushing down on the handle would gradually unscrew the mounting nut over thousands of flushes. The reverse thread means the downward force tightens the nut instead of loosening it. If you are fighting the nut in the wrong direction, remember: clockwise to remove, counterclockwise to install.
Can I replace just the handle lever without replacing the internal arm?
If the internal arm is intact and only the external lever is broken, you can sometimes replace just the lever. However, universal kits are sold as complete assemblies for $6 to $12. Buying just the lever is rarely cheaper and risks incompatibility with the existing arm. Replace the entire assembly and keep the old working parts as spares.
What if the new handle is loose even after tightening the nut?
If the handle wobbles in the mounting hole, the hole in the tank may be oversized or the handle shaft is too narrow for it. Some universal handles include spacer washers or bushings to adapt to different tank hole sizes. If the kit did not include them, a rubber washer between the handle and the outside of the tank takes up the slack. If the problem is the hole being cracked or oval-shaped rather than round, the tank itself needs repair, which is a more involved job.
Do front-mount and side-mount handles use the same mechanism?
They use the same principle but the parts are not interchangeable. A front-mount handle passes through the front wall of the tank. A side-mount handle passes through the left or right wall. The arm shape and chain routing differ. Buy a handle that matches your toilet’s mounting position. A side-mount handle installed in a front-mount tank will not engage the flapper correctly.
The Ten-Minute Fix You Have Been Putting Off
A broken toilet handle is one of those repairs that costs almost nothing and takes almost no time, but it is easy to ignore because the toilet still works if you reach into the tank. After a few days of manual flushing, the lid sits crooked on the tank because you stopped replacing it properly, and the whole bathroom feels slightly broken.
The new handle costs less than the lunch you will eat today. The only trick is the reverse thread. Turn the nut the wrong way once, learn the lesson, and the next time a handle breaks, the repair takes five minutes instead of ten.
Last modified: June 18, 2026