The RV toilet has been a problem since the trip to Moab two summers ago. The foot pedal sticks halfway down, the bowl does not hold water between uses, and there is a faint odor that comes and goes regardless of how thoroughly you clean the black tank. You have been tolerating it because replacing an RV toilet sounds like it involves cutting into the floor or dropping the black tank. It does not. The entire job is four bolts, one water connection, and roughly 45 minutes.
RV toilets are simpler than residential toilets. There is no tank on the back. There is no wax ring. The flush mechanism is either a foot pedal or a hand lever that opens a blade valve at the bottom of the bowl, letting waste drop directly into the black tank below. Replacing one is a matter of unbolting the old unit, cleaning he mounting flange, and bolting the new one in its place. The specifics depend on whether your RV has a gravity-flush toilet, which is most common, or a macerating toilet found in some higher-end motorhomes.
This guide covers both types, the foam seal that replaces the wax ring you are used to from residential plumbing, and the step most first-timers forget that results in water spraying out of the disconnected supply line.
Before You Touch Anything: Water and Power
RV water systems are pressurized by an onboard 12-volt water pump or by city water hookup pressure. Disconnecting the toilet supply line without depressurizing the system results in a spray of water inside the RV. The bathroom in an RV is small. Everything within a three-foot radius of the toilet will get wet.
Turn off the RV’s water pump at the control panel. If connected to city water, disconnect the hose at the campground spigot or the RV’s city water inlet. Open a faucet inside the RV, both hot and cold, to relieve residual pressure in the lines. Leave the faucet open while you work. Water will still dribble out of the toilet supply line when you disconnect it, so have a towel and a small bowl ready.
If the RV toilet is a macerating model that runs on 12-volt power, turn off the RV’s house battery disconnect switch or remove the fuse for the toilet circuit. You are working around water and electrical connections. Power off is not optional.
Removing the Old Toilet
Step 1: Disconnect the Water Supply Line
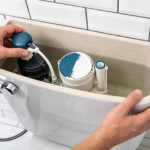
The water supply line connects to the back or side of the toilet, usually through a plastic fitting that threads directly into the toilet’s water inlet valve. On Dometic and Thetford models, the connection is typically a 1/2-inch PEX fitting or a flexible braided hose with a compression nut.
Place a towel and a small bowl under the connection. Unscrew the supply line fitting by hand or with channel-lock pliers. If the fitting is plastic, use only hand pressure. Plastic RV plumbing fittings become brittle with age and will crack under pliers. A cracked fitting means a trip to an RV parts store for a replacement before you can finish the job. Pull the supply line away from the toilet and let any remaining water drain into the bowl.
Step 2: Remove the Mounting Bolts
The toilet is held to the floor by two or four bolts that pass through the base and thread into the mounting flange. On most RV toilets, the bolts are hidden under plastic caps on the base. Pop the caps off with a flathead screwdriver. If there are no caps, the bolt heads are exposed on either side of the base.
Use a socket wrench or a nut driver, typically 7/16-inch or 1/2-inch, to remove the nuts. RV toilet bolts are often brass or stainless steel and may have corroded in place if the toilet has ever leaked. If a bolt spins without loosening, the nut on the underside of the flange has broken free. Reach under the flange from the basement storage compartment or, on some floor plans, by removing a panel below the toilet. Hold the underside nut with pliers while turning the bolt from above.
Once all nuts are removed, lift the toilet straight up. It will feel stuck. The foam seal between the toilet and the flange compresses over years and adheres to both surfaces. Rock the toilet gently side to side to break the seal, then lift. Do not pry with a screwdriver against the plastic flange. A cracked flange turns a 45-minute toilet swap into a flange replacement that requires cutting the floor.
Step 3: Clean the Mounting Flange
The black tank’s odor is now open to the RV interior. Work efficiently. Scrape the old foam seal residue off the flange with a plastic putty knife. Do not use a metal scraper on a plastic flange. Wipe the flange surface clean with a rag and RV-approved cleaner. Inspect the flange for cracks. A cracked or broken flange must be replaced before installing the new toilet. The flange is screwed to the floor and sealed to the black tank. Replacement is more involved than the toilet swap itself but it is not optional. A cracked flange leaks black tank gases into the RV continuously.
Stuff a rag into the flange opening while you work. This does two things: it blocks the odor and it prevents anything from falling into the black tank. A dropped bolt in the black tank is retrievable only by draining and flushing the tank, which is a job you do not want to add to this one.
Installing the New Toilet
Step 4: Install the New Foam Seal
RV toilets use a closed-cell foam seal instead of a wax ring. The seal sits between the toilet base and the flange. It compresses when the toilet is bolted down, creating an airtight and watertight barrier. Most new toilets include the seal in the box. If yours does not, buy one separately. Do not reuse the old seal. A compressed foam seal will not re-expand enough to seal a second time.
Place the seal on the flange, centered over the opening. Some seals are adhesive on one side. Peel the backing and press the seal onto the flange. If the seal is not adhesive, it will stay in place once the toilet is set on top.
Step 5: Set the New Toilet in Place
Lower the new toilet straight down onto the flange, aligning the bolt holes in the base with the bolts in the flange. The toilet must sit flat on the seal without rocking. If it rocks, the flange is not level or debris is caught under the base. Lift the toilet and check.
Insert the bolts through the base and thread the nuts hand-tight. Tighten the nuts evenly in a cross pattern, a few turns at a time. The goal is to compress the foam seal uniformly. Overtightening cracks the plastic base or the flange. The nuts should be snug, then a quarter-turn past snug. The foam seal does the sealing, not bolt torque. If the toilet rocks after tightening, the seal is not seated correctly or the flange is warped. Loosen, reseat, and retighten.
Step 6: Connect the Water Supply
Thread the water supply line onto the new toilet’s inlet fitting. If the old supply line does not reach the inlet on the new toilet, which happens when switching brands, install a flexible braided RV toilet supply line. These are available at any RV parts store for $10 to $15 and are easier to work with than rigid PEX connections.
Hand-tighten the fitting, then a quarter-turn with pliers if it is metal. If the fitting is plastic, hand-tighten only. Remove the rag from the flange opening before you bolt the toilet down, which you already did in the previous step. If the rag is still in the flange and the toilet is already bolted down, unbolt the toilet and remove the rag. This happens more often than RV owners admit.
Step 7: Test the Installation
Turn the water pump back on or reconnect city water. Close the open faucet you used to depressurize the lines. Check the toilet supply connection for leaks. A dry paper towel pressed against the fitting reveals a seep that is invisible to the eye. Flush the toilet several times. Confirm the blade valve opens fully and closes completely. Pour a small amount of water into the bowl and check that it holds. The bowl should retain water between uses. If the water drains out immediately, the blade valve seal is not seated, which is a defect in the new toilet, not an installation error. Exchange it.
Gravity-Flush vs. Macerating Toilets
Most RVs use a gravity-flush toilet. The bowl sits directly above the black tank, and waste drops through an open blade valve into the tank. Replacement is the bolt-and-seal process described above. The only variable between brands is the bolt pattern on the flange. Dometic and Thetford use slightly different mounting footprints. A Dometic toilet will not bolt directly to a Thetford flange without an adapter. Measure the bolt pattern before buying the replacement. Standard RV toilet flanges have either a 4-bolt square pattern or a 2-bolt pattern.
Macerating toilets, found in some Class A motorhomes and in RVs where the toilet is not directly above the black tank, use an electric pump to grind waste and pump it to the tank. Replacing a macerating toilet involves an additional step: disconnecting the 12-volt power supply and reconnecting it to the new unit. The mounting and water connection are otherwise the same. The macerator pump is integrated into the toilet base. If the pump still works and only the bowl or seal is bad, you can replace just the upper toilet assembly while reusing the macerator base. Check with the manufacturer for compatibility.
What Replacing an RV Toilet Costs
| Item | Cost |
| Gravity-flush RV toilet (Dometic/Thetford standard) | $120-250 |
| Gravity-flush RV toilet (porcelain bowl upgrade) | $250-500 |
| Macerating RV toilet | $500-1,200 |
| Foam seal (if not included) | $5-10 |
| Flexible braided supply line (if needed) | $10-15 |
| Flange adapter (brand mismatch) | $15-25 |
| Professional RV technician labor | $150-300 |
The DIY savings are about $150 to $300 in labor. The physical work is not difficult. The value of a professional is knowing which toilet fits your existing flange without an adapter, having the right supply line fitting on the truck, and dealing with a corroded bolt that spins freely so you do not have to crawl into the basement compartment.
Frequently Asked Questions
How do I know which replacement toilet fits my RV?
Measure the bolt pattern on the existing flange. Most RV toilets use a standard 2-bolt or 4-bolt pattern. Dometic and Thetford are the two major brands, and toilets within the same brand typically share a bolt pattern across models. If you are switching brands, measure the distance between bolt holes and confirm the new toilet’s mounting footprint matches. An adapter flange is available for most brand-to-brand conversions. Take a photo of the flange and the existing toilet’s data plate, usually found under the seat or on the back of the base, to the RV parts store.
Can I use a residential wax ring instead of a foam seal on an RV toilet?
No. Wax rings are designed for stationary residential toilets that do not move. RVs travel. The vibration and flexing of the floor during transit will cause a wax ring to crack and leak. Closed-cell foam seals are specifically designed to withstand the movement of an RV. They also allow the toilet to be removed for black tank access without replacing the seal each time, provided the seal is still pliable. Use a foam seal.
Why does my new RV toilet not hold water in the bowl?
The blade valve at the bottom of the bowl must close completely for the bowl to hold water. If the blade valve is not fully closing, check that the foot pedal or hand lever is returning to its full rest position. If the pedal is sticking, the linkage may need lubrication with a silicone-based spray. If the valve itself is defective, which happens occasionally with new toilets, the toilet must be exchanged. A bowl that will not hold water is a manufacturing defect, not an installation error.
The Toilet That Goes Down the Road
Replacing an RV toilet is the same job as replacing a residential toilet with a few differences: the seal is foam instead of wax, the water connection is a single PEX or braided line instead of a rigid supply tube, and the black tank opening is right there under the flange, so the rag-in-the-flange trick is not optional. The job takes under an hour. The hardest part is working in a bathroom the size of a phone booth.
Keep the old toilet’s foam seal or buy a spare. The foam seal is the only consumable in the system, and having one on hand means the next toilet removal, for whatever reason, does not require a trip to the store before you can finish.
Last modified: June 18, 2026