A roof is only as good as the seal keeping water out. For flat and low-slope roofs, that seal is the waterproofing membrane — and choosing the wrong one can cost thousands in structural damage within a single rainy season, highlights Next Step Realty Management experts. The global roofing membrane market is projected to exceed $35 billion by 2030, driven largely by the shift from traditional built-up roofing to high-performance sheet and liquid-applied systems.
The decision isn’t just about price. A waterproofing membrane roof must handle specific climate stressors: UV degradation in Phoenix is a different problem than freeze-thaw cycling in Minneapolis or ponding water on a coastal Florida flat roof. Contractors and homeowners alike often discover too late that the cheapest membrane per square foot carries the highest long-term maintenance cost.
This guide breaks down the five major membrane types — liquid-applied, torch-on, self-adhering, EPDM, and TPO — with real cost data, installation trade-offs, and the climate factors most articles ignore.
What Is a Roof Waterproofing Membrane?
A roof waterproofing membrane is a continuous, flexible barrier applied to roof surfaces that stops liquid water from penetrating the building structure while allowing the roof to expand and contract with temperature changes. It differs from a roof coating (which primarily protects the existing membrane from UV damage) and a vapor barrier (which blocks moisture vapor, not liquid water). Here is how each works and why the distinction matters.
Roof Membrane vs. Waterproofing Membrane vs. Roof Coating
These three terms get thrown around interchangeably on contractor forums and product labels. They are not the same thing. Here is the practical difference:
| Product | Primary Function | Typical Thickness | Installation | Common Mistake |
|---|---|---|---|---|
| Roof Waterproofing Membrane | Stops liquid water ingress; forms the primary weather barrier | 40–80 mils (1–2 mm) | Torch-applied, cold adhesive, self-adhering, or liquid-applied | Using a coating as the sole waterproofing layer |
| Roof Coating | Protects the membrane from UV, extends service life, reflects heat | 10–30 mils (0.25–0.75 mm) | Roller, brush, or spray over existing membrane | Applying over a failing membrane — the coating fails with it |
| Vapor Barrier | Blocks moisture vapor diffusion (not liquid water) | 6–15 mils (0.15–0.38 mm) | Laid under insulation or between roof deck layers | Confusing vapor permeability with waterproofing |
What many homeowners don’t realize: a roof coating is not a substitute for a waterproofing membrane. Coatings are sacrificial topcoats. They protect the real waterproofing layer underneath. If you apply a coating directly to a roof deck and call it waterproofed, you will almost certainly get a leak within two years.
How a Waterproofing Membrane Protects Your Roof
A waterproofing membrane works through three mechanisms simultaneously. First, it forms a continuous physical barrier — no seams, no gaps, no weak points where water can find a path through. Second, the material itself resists water penetration under hydrostatic pressure (standing water). Third, modern membranes incorporate UV stabilizers that prevent the polymer chains from breaking down under sunlight.
The critical detail most articles skip: membranes must remain flexible after installation. Roofs move. Thermal expansion, structural settling, and wind uplift create constant stress. A membrane that becomes brittle after five years will crack, and a cracked membrane is worse than no membrane at all, it traps water against the deck.
According to the National Roofing Contractors Association (2024), the average service life of a properly installed waterproofing membrane on a low-slope roof is 15–25 years, depending on membrane type and climate exposure. The difference between a 15-year roof and a 25-year roof often comes down to one thing: whether the membrane was protected by a reflective coating or left exposed to direct UV radiation.
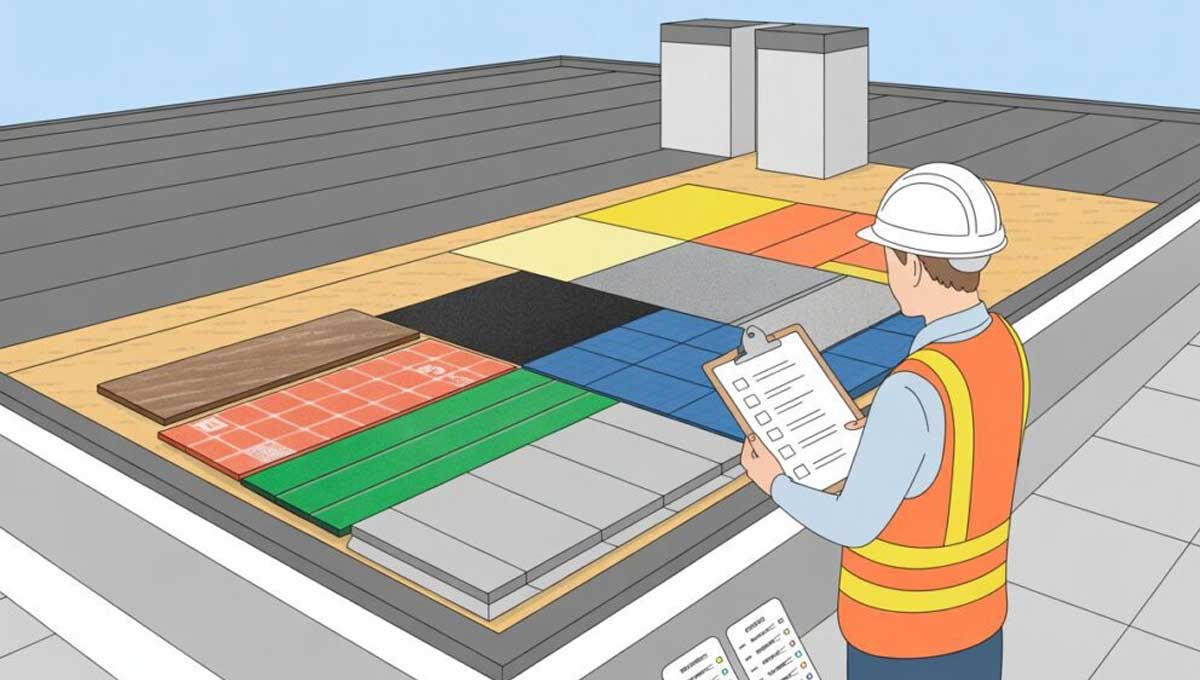
Types of Roof Waterproofing Membranes
The three main categories of roof waterproofing membrane are liquid-applied, sheet (torch-on or cold-applied), and self-adhering membranes. Each type differs fundamentally in application method, durability, and cost. Liquid membranes form a seamless rubber-like layer ideal for complex roof shapes. Sheet membranes offer superior physical toughness for high-traffic areas. Self-adhering membranes combine moderate durability with the fastest, cleanest installation. Your choice depends on roof geometry, expected foot traffic, and budget.
Liquid-Applied Membranes (Including Liquid Rubber)
Liquid-applied membranes are rolled or sprayed onto the roof surface as a cold fluid that cures into a seamless, monolithic rubber sheet. Coverage rates typically range from 50 to 80 square feet per gallon per coat, depending on the solids content and required dry film thickness (usually 20–40 mils). The main advantage is zero seams, no laps, no overlaps, no weak points where water can penetrate. This makes liquid membranes the go-to choice for roofs with penetrations (vents, pipes, skylights) or irregular shapes where sheet goods would require excessive cutting and flashing.
Flexibility is another strong suit. High-performance liquid polyurethane and liquid rubber membranes can stretch 300–500% before breaking, accommodating thermal expansion and minor structural movement without cracking. Typical lifespan is 10–15 years for acrylic-based formulas and 15–20 years for polyurethane or silicone systems. The trade-off: application requires meticulous surface preparation and consistent wet-film thickness. A common mistake contractors see is applying too thin a coat to save money, which leads to premature failure. According to the National Roofing Contractors Association (2024), improper film thickness is the leading cause of liquid membrane warranty claims.
Sheet Membranes (Torch-On, Cold-Applied, Self-Adhering)
Sheet membranes arrive as factory-manufactured rolls of modified bitumen (APP or SBS) or synthetic polymers (PVC, TPO, EPDM). They are installed by torching (melting the underside with a propane torch), cold-applying with adhesive, or peeling and sticking (self-adhering). Each method has distinct trade-offs.
Torch-on membranes are the most durable option in this category. The heat-fused seam creates a molecular bond that is often stronger than the sheet itself. These systems routinely last 20–30 years on properly prepared decks. The catch: open-flame work requires a licensed contractor, fire watch protocols, and is banned on many wood-deck structures. Cold-applied sheet membranes use solvent-based or water-based adhesives, safer than torching but sensitive to temperature and humidity during installation.
Self-adhering membranes are the fastest-growing segment for residential flat roofs. The peel-and-stick backing eliminates torches, heavy kettles, and wet adhesives. Installation time drops by roughly 40% compared to torch-on methods. However, the adhesive bond relies entirely on surface cleanliness and primer quality. One thing manufacturers rarely explain: self-adhering membranes perform poorly in below-40°F conditions because the adhesive loses tack. They also have lower puncture resistance than torch-applied sheets, generally 20–30% less impact strength, according to ASTM D6878 testing data.
Bituminous vs. Synthetic vs. Elastomeric, Quick Material Breakdown
| Material Family | Common Types | Typical Lifespan | Key Strength | Key Weakness |
|---|---|---|---|---|
| Bituminous (modified bitumen) | APP, SBS torch-on or self-adhering sheets | 10–20 years | High puncture resistance; excellent for high-traffic roofs | Degrades under UV without coating; torch-on requires open flame |
| Synthetic (single-ply) | TPO, PVC, EPDM rubber sheets | 20–30 years | Superior UV and chemical resistance; lightweight | Seam integrity depends on installation quality; higher material cost |
| Elastomeric (liquid-applied) | Polyurethane, silicone, acrylic liquids | 10–20 years | Seamless application; handles complex shapes and penetrations | Thickness consistency is skill-dependent; slower cure time in high humidity |
Bituminous membranes dominate the budget end of the market. Synthetics like TPO and EPDM lead in commercial longevity. Elastomeric liquids are the go-to for complex roof geometry where sheet seams would multiply the failure points.
How to Choose the Right Membrane for Your Roof
Choosing the right waterproofing membrane for your roof comes down to four factors: your roof’s slope, your local climate, your budget, and whether you plan to install it yourself or hire a pro. The wrong choice means leaks within two to three years. The right one can last 20 to 30 years with minimal maintenance.
Climate & Regional Considerations
Your local weather is the single biggest factor in membrane performance. In high-UV regions like Arizona or Southern California, liquid-applied acrylic and silicone membranes outperform bituminous products, which degrade under intense sun exposure. According to the National Roofing Contractors Association (2025), UV degradation shortens the lifespan of uncoated bituminous membranes by up to 40 percent in desert climates.
Freeze-thaw cycles demand flexibility. Roofs in the Midwest and Northeast need membranes that expand and contract without cracking. Weather conditions in these regions can place significant stress on an unprotected substrate, making seasonal timing and professional assessment critical. Consulting with local specialists, such as professional roofers serving Liverpool NY homeowners, can help clarify which setup best handles localized winter accumulation and regional temperature drops. Selecting an appropriate system helps prevent premature wear and supports the long-term performance of your entire exterior weather barrier. Ensure you discuss material flexibility ratings before finalizing your material selection to optimize seasonal resistance. Self-adhering modified bitumen sheets and liquid rubber (polyurethane) handle temperature swings well. TPO and PVC single-ply membranes also work, but require professional heat-welded seams to stay watertight at the joints.
High rainfall regions, think the Pacific Northwest or Gulf Coast, need membranes that resist ponding water. Liquid-applied systems shine here because they form seamless monolithic barriers. Sheet membranes with lapped seams create potential failure points if not installed perfectly. A common mistake is assuming all membranes are equal against standing water. They are not.
Flat Roof vs. Sloped Roof
Flat roofs (defined as anything under a 2:12 pitch) require membranes designed for ponding water. Water doesn’t drain quickly, so the membrane must remain watertight even when submerged for days. Built-up roofing (BUR) with multiple plies of bitumen and gravel handles this well. Liquid-applied polyurethane and silicone membranes also work, provided they are applied at the manufacturer’s recommended thickness, typically 20 to 40 mils dry film thickness.
Sloped roofs shed water naturally, so the membrane’s primary job is preventing wind-driven rain from penetrating under shingles or tiles. Self-adhering ice and water shield membranes are standard underlayment for sloped roofs in cold climates. These are not designed for long-term UV exposure, so they must be covered by the primary roofing material within 30 days of installation.
What many homeowners don’t realize: using a membrane rated for sloped roofs on a flat roof voids the warranty almost immediately. Check the manufacturer’s slope rating before buying.
Cost Per Square Foot Comparison
Membrane costs vary dramatically by material and labor complexity. Here is the breakdown for a typical 1,000-square-foot roof, based on 2025 industry averages from Roofing Contractor magazine and RSMeans data:
| Membrane Type | Material Cost (per sq. ft.) | Installed Cost (per sq. ft.) | Typical Lifespan | DIY Feasibility |
|---|---|---|---|---|
| Liquid-applied acrylic | $1.50 – $2.50 | $4.00 – $7.00 | 10–15 years | High |
| Liquid-applied polyurethane | $2.00 – $3.50 | $5.00 – $8.00 | 15–20 years | Moderate |
| Self-adhering modified bitumen | $1.75 – $3.00 | $3.50 – $5.50 | 10–15 years | Moderate |
| Torch-on modified bitumen | $1.25 – $2.00 | $3.00 – $6.00 | 15–20 years | Low (requires pro) |
| EPDM rubber sheet | $1.50 – $2.50 | $4.00 – $8.00 | 20–30 years | Moderate |
| TPO / PVC single-ply | $2.00 – $3.50 | $5.00 – $9.00 | 20–30 years | Low (requires pro) |
Higher upfront cost does not always mean better value. A $3.00/sq. ft. torch-on membrane lasting 20 years costs roughly the same per year as a $5.00/sq. ft. liquid system lasting 15 years, and the torch-on membrane delivers better puncture resistance in between.
DIY vs. Professional Installation: What You Need to Know
Most homeowners can handle a liquid-applied membrane on a small, simple flat roof under 500 square feet. Anything larger, steeper, or with multiple penetrations demands a professional. The line between a weekend project and a costly mistake comes down to three things: roof complexity, warranty requirements, and your tolerance for risk.
DIY Installation Checklist
Surface preparation is 80% of the job. The substrate must be clean, dry, and free of loose debris. Cracks wider than 1/8 inch need filler. Temperature must stay between 50°F and 85°F during application and for 24 hours after, cold weather ruins adhesion, heat causes bubbling.
Safety gear is non-negotiable: non-slip shoes, a harness for any roof with a pitch over 2:12, and gloves for solvent-based membranes. A common mistake is applying the membrane too thin. Liquid membranes require a minimum wet film thickness of 20-40 mils per coat, and most DIYers apply half that. Use a wet film gauge.
Tools you will need: a heavy-duty roller with a 3/4-inch nap, a stiff broom, a utility knife, a caulking gun for sealant, and a mixing paddle for a 1/2-inch drill. Plan for two full coats with 6-12 hours of drying time between them. Do not rush this.
When to Call a Contractor
Call a contractor when your roof has multiple vents, skylights, drains, or HVAC units. Each penetration is a leak point, and flashing those details correctly takes experience. Torch-on modified bitumen membranes are especially dangerous for DIYers, the propane torch requires a fire watch and a fire extinguisher on site at all times.
Warranty requirements are another dealbreaker. Most manufacturers void their 10- to 20-year warranty if a licensed contractor did not install the membrane. If your roof is under 10 squares (1,000 square feet) and you are comfortable with no warranty, DIY is feasible. For commercial projects or roofs over 2,000 square feet, hire a pro, the cost of fixing one seam failure outweighs the labor savings.
“I did my own liquid rubber on a 6m x 4m flat roof. Saved £800. But I spent two weekends prepping and it still looked patchy in one corner. If I had a complex roof, I’d pay someone.”
– r/DIYUK discussion, June 2025
| Factor | DIY Feasible | Hire a Contractor |
|---|---|---|
| Roof size | Under 500 sq ft | Over 1,000 sq ft |
| Roof complexity | No penetrations; simple rectangular layout | Multiple vents, skylights, drains, or irregular shape |
| Membrane type | Liquid-applied acrylic or polyurethane | Torch-on, TPO/PVC heat-welded, or EPDM |
| Warranty | Typically void; self-insured risk | 10–20 year manufacturer warranty included |
| Cost savings | 40–60% less than contractor quote | Pays for itself in warranty and longevity |
Step-by-Step Guide: How to Install a Waterproofing Membrane on a Roof
Installing a waterproofing membrane roof requires methodical surface prep, precise application, and strict adherence to temperature windows. The process differs significantly between liquid and sheet systems. Both methods share one non-negotiable rule: a clean, dry, structurally sound substrate. Skip this, and the membrane fails regardless of cost or brand.
Surface Preparation, Cleaning, Repairing Cracks, and Priming
Start by removing all debris, loose gravel, and old coatings. Power wash the roof at 1,500–2,000 PSI and let it dry fully, typically 24 hours in moderate weather. Repair cracks wider than 1/16 inch with a compatible filler or cement patch. Blisters and bubbles must be cut open, dried, and patched. According to the National Roofing Contractors Association (2024), surface moisture content must read below 15% on a moisture meter before any primer or membrane touches the deck. Apply a manufacturer-specific primer using a roller or brush, working in sections. Primer drying time ranges from 30 minutes to 4 hours depending on humidity and product type. One thing many DIYers miss: primer temperature matters as much as air temperature. If the primer is below 50°F, it won’t bond properly.
Applying Liquid Membrane, Rolling/Brushing Technique, Curing Time, and Multiple Coats
Liquid-applied membranes cure by solvent evaporation or chemical reaction. Most require two to three coats at a wet film thickness of 20–40 mils per coat. Use a medium-nap roller for open areas and a 3-inch brush for edges, vents, and drains. Apply the first coat in a single direction, then the second coat perpendicular to the first. This cross-hatch pattern eliminates pinholes. Curing time between coats varies: 4–12 hours for acrylic-based products, 24–48 hours for polyurethane systems. Total dry film thickness should reach 60–80 mils, roughly the thickness of a credit card. A common mistake is applying the second coat too early, trapping solvent and causing blisters. The surface must feel tack-free before proceeding. Ambient temperature should stay above 50°F for the full cure cycle, typically 72 hours.
Installing Sheet Membrane, Overlap, Seam Sealing, and Flashing Details
Sheet membranes (torch-on, self-adhering, or cold-applied) demand precise alignment. Roll out the sheet and let it relax for 30 minutes before bonding to remove memory curl. Overlap side laps by 3–4 inches and end laps by 6 inches. For torch-on membranes, heat the underside and the substrate simultaneously until the flame indicator pattern appears, a glossy sheen, then roll firmly with a weighted roller. Self-adhering sheets require peeling the release liner and pressing with a silicone roller at 40–60 PSI to eliminate air pockets. Every seam needs a compatible sealant or primer wipe. Flashing details at walls, curbs, and drains require separate membrane strips cut to fit, not stretched. Stretching creates thin spots. The table below summarizes the key differences between the two methods.
| Installation Factor | Liquid-Applied Membrane | Sheet Membrane |
|---|---|---|
| Surface prep time | 1–2 days (cleaning, drying, priming) | 0.5–1 day (sweep, patch, prime) |
| Installation speed | 2–3 days for 1,000 sq ft (multiple coats + cure time) | 1–2 days for 1,000 sq ft (single-pass coverage) |
| Seam integrity | Seamless, no joints to fail | Lapped seams; quality depends on installer skill |
| Weather sensitivity | Cannot apply in rain or below 50°F; humidity slows cure | Self-adhering: sensitive to cold; torch-on: wind can disrupt flame |
| Flashing complexity | Easy, brush around penetrations naturally | Moderate, requires cutting, fitting, and sealing separate strips |
| Best for | Irregular roofs with many penetrations | Large, open rectangular roofs |
Frequently Asked Questions
What is the best waterproofing membrane for a flat roof?
The best membrane depends on your roof’s traffic, ponding water risk, and budget. For residential flat roofs, liquid-applied polyurethane membranes offer seamless coverage and excellent ponding water resistance, typically lasting 15–20 years. For commercial flat roofs, 60-mil EPDM sheet membrane is the industry standard, it handles UV exposure well and costs $4–$8 per square foot installed. Torch-on modified bitumen remains popular for garages and sheds at $3–$6 per square foot, but requires professional installation due to fire risk.
How long does a waterproofing membrane last on a roof?
Lifespan varies dramatically by material and climate. Liquid-applied polyurethane membranes last 15–20 years with proper maintenance. EPDM rubber sheet membranes typically last 20–30 years, though UV degradation in high-sun regions can cut that to 15 years. Torch-on modified bitumen averages 10–15 years. A common mistake homeowners make: assuming all membranes last 25+ years. In practice, freeze-thaw cycles in northern climates reduce lifespan by 30–40% compared to mild regions, according to the National Roofing Contractors Association (2023).
Can you walk on a waterproofing membrane roof?
Yes, but only certain types and with precautions. EPDM and TPO sheet membranes are designed for light foot traffic during maintenance, they can handle 200–300 pounds distributed across a wide footprint. Liquid-applied membranes are more fragile; walking on them without protective walkway pads can puncture the coating and void the warranty. A rule contractors rarely explain: never walk on any membrane in direct summer heat above 90°F. The softened material compresses under weight, creating permanent depressions that pool water and accelerate failure.
What is the difference between a roof membrane and a waterproofing membrane?
Roof membrane is the broader category, it includes both waterproofing and weatherproofing products. A waterproofing membrane specifically stops liquid water under hydrostatic pressure (ponding water, standing rain). A standard roof membrane may only shed water while allowing vapor transmission. The critical distinction: waterproofing membranes are tested to ASTM D4068 (hydrostatic pressure resistance), while basic roof membranes only meet ASTM D4637 for weather exposure. If your flat roof has areas where water sits for more than 48 hours, you need a true waterproofing membrane, not just a roof membrane.
How do you apply liquid waterproofing membrane to a roof?
Application follows a strict sequence most DIYers skip at their own risk. First, clean the surface completely, power wash and allow 24 hours of dry weather. Repair all cracks and blisters with a compatible filler. Apply primer to bare concrete or metal surfaces. Roll on the first coat at 15–20 mils wet thickness using a medium-nap roller, working in consistent direction. Wait for full tack-free cure (typically 4–8 hours at 70°F). Apply the second coat perpendicular to the first at the same thickness. The non-negotiable detail: minimum dry film thickness must reach 30 mils total across both coats. Check with a wet film gauge after each coat. Ambient temperature must remain above 50°F for 72 hours after final application, cold nights during cure are one of the leading causes of early membrane failure.
Conclusion
Making Your Final Decision
Choosing the right waterproofing membrane roof system comes down to three factors: your climate, your budget, and whether you plan to DIY or hire a pro.
For high-UV or freeze-thaw climates, synthetic sheet membranes (TPO or PVC) offer the best long-term durability, typically lasting 20–30 years. For low-slope or flat roofs prone to ponding water, liquid-applied membranes create a seamless barrier that eliminates seam failure. On a tight budget? Self-adhering modified bitumen sheets cost $3.50–$5.50 per square foot installed, compared to $7–$12 for premium liquid systems.
What many homeowners overlook is surface condition. No membrane, regardless of price, performs well on a poorly prepared roof. Cracks, moisture, and debris will compromise adhesion within months.
One Thing Before You Buy
Assess your specific roof conditions first. Walk your roof (if safe) or inspect from a ladder. Note drainage patterns, existing repairs, and any soft spots. Take photos. This 30-minute inspection will save you from buying the wrong product, a mistake that costs far more than the membrane itself.
“I wish I had checked my roof condition before buying. Ended up with a liquid membrane that couldn’t bond to the old coating.”
– r/DIYUK discussion, 2025
Match the membrane to your roof, not the other way around. That single decision determines whether your waterproofing lasts 5 years or 25.
Last modified: June 16, 2026