Fixing a leaky outdoor faucet usually means shutting off the water, removing the handle and stem, and replacing the worn washer or packing washer that no longer seals the valve. Most standard hose bib repairs are inexpensive and straightforward. The part that matters is diagnosis: a handle leak, a spout drip, a bad hose washer, and a frost-free leak inside the wall are not the same repair, explains Brentwood Square Management specialists.
You usually notice it right after coiling the hose and walking away. A few seconds later, the slow tick starts again, and now you have to decide whether this is a five-minute tightening job or the beginning of something worse. The U.S. Environmental Protection Agency said in 2026 that household leaks waste nearly 1 trillion gallons of water annually nationwide, and dripping faucets remain one of the most common easy-to-fix offenders.
Diagnose Where the Outdoor Faucet Is Leaking
If you have just shut the faucet off and the drip is still landing on the concrete, the first job is to track exactly where that water is escaping. An outdoor faucet leak usually shows up in one of four places: the handle, the spout, the hose connection, or inside the wall behind a frost-free sillcock.
A hose bib is an exterior faucet designed to feed a garden hose or irrigation attachment. A frost-free sillcock is a long-stem outdoor faucet that shuts water off deeper inside the wall so the washer sits in a warmer zone than the exterior body. A packing nut is the threaded nut behind the handle that compresses packing material around the stem to stop water from leaking around the handle shaft.
| What you see | Most likely cause | Best first move | DIY or stop? |
|---|---|---|---|
| Water beads around the handle when the faucet is on | Loose packing nut or worn packing washer | Tighten the packing nut slightly, then retest | DIY |
| Spout drips after the faucet is fully off | Worn bibb washer or worn stem washer | Shut water off and pull the stem assembly | DIY |
| Leak happens only with a hose attached | Bad hose washer or loose hose connection | Replace the hose washer first | DIY |
| Water drips from a vacuum breaker cap on top | Failed vacuum breaker seal | Replace the vacuum breaker kit if serviceable | DIY, if model supports it |
| Water stains indoors or drips behind the siding after use | Split frost-free tube or leak inside the wall | Shut water off and investigate from inside | Usually stop and call a plumber |
Seattle Public Utilities and the Saving Water Partnership separate outdoor faucet leaks into two simple branches: handle leaks and spout leaks. That is still the cleanest starting point. The Environmental Protection Agency also advises checking your water meter before and after a two-hour period when no water is being used; if the meter changes, you likely have a leak somewhere in the system.
Recent posts on r/Plumbing and r/howto about leaky outdoor faucets underline the same problem from a homeowner angle: people are usually less intimidated by the wrench than by the uncertainty. The same exterior drip can mean a loose packing nut, a worn stem washer, or a frost-free issue hidden deeper in the body.
Most homeowners do not mind replacing a washer. They mind taking the faucet apart before they know whether the leak is actually in the faucet, the hose connection, or the wall behind it.
The frustrating part is not the leak itself. It is the gap between a tiny drip on the outside and the very different repairs that drip might represent.
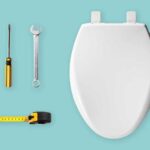
Tools and Parts to Gather Before You Start
Before you loosen anything, gather the tools and replacement parts that match your faucet. Most delays happen not because the repair is hard, but because the old washer comes out in a size you did not expect and now the faucet is apart on the workbench.
- Flathead and Phillips screwdrivers for the handle screw and cap
- Adjustable wrench for the packing nut and stem assembly
- Slip-joint pliers for stubborn caps or clips
- Replacement bibb washer or stem washer matched to the old part
- Packing washer or packing string if the leak is around the handle
- Plumber’s grease for washers and moving parts
- Bucket and rag for residual water
- Phone camera to record orientation before removal
Seattle Public Utilities specifically recommends taking the old washer to a plumbing supply store so you can match the replacement correctly. That advice is worth following. Exterior faucets often look generic from the outside, but washer diameter, screw length, and stem length vary enough to turn a simple repair into a second trip.
Before disassembly, take three quick photos: the handle in place, the exposed stem once the handle is off, and the washer at the end of the stem once it comes out. If the stem has an unusual orientation or spacer, those photos save a lot of second-guessing during reassembly.
One missing washer size can turn a ten-minute repair into an extra afternoon of driving around with a damp brass stem in your pocket.
Fix a Standard Hose Bib That Leaks From the Spout or Handle
A standard hose bib that leaks at the handle usually needs the packing nut tightened or the packing washer replaced. A faucet that drips from the spout after shutoff usually needs the stem removed so you can replace the bibb washer or stem washer at the end of the assembly.
If Water Leaks Around the Handle
Start with the least invasive fix. Turn the faucet on slightly, then use an adjustable wrench to tighten the packing nut just a quarter turn clockwise. Do not crank it down hard. Retest the faucet. If the seepage stops, you are done.
If the handle still leaks, shut the water off to that line or to the house main. Remove the handle screw, pull the handle off, then back off the packing nut and remove the old packing washer or packing material. Replace it with a matching part, apply a little plumber’s grease, reinstall the nut, and snug it just enough to seal without making the handle bind.
If Water Drips From the Spout After Shutoff
A spout drip after shutoff almost always points to the washer at the end of the stem assembly. That washer presses against the valve seat every time the faucet closes. When it hardens, splits, or wears unevenly, the water finds a path through.
- Shut off the water supply. Use the branch shutoff if you have one. If not, turn off the main water supply to the house.
- Open the faucet fully. Let residual water drain out so the stem is not under pressure.
- Remove the handle. Pop off the decorative cap if there is one, then remove the handle screw and pull the handle free.
- Undo the packing nut. Seattle Public Utilities describes this as the nut directly behind the handle. Turn it counterclockwise and slide it off.
- Pull out the valve stem assembly. On some faucets it slides out. On others it backs out with the threads. Go slowly and keep the orientation consistent.
- Inspect the washer at the base of the stem. Remove the retaining screw, swap in a matching new washer, and check the screw head while you are there. A stripped screw is a good reason to replace the stem assembly instead of forcing a patch.
- Grease and reassemble. Apply a thin film of plumber’s grease, reinstall the stem, tighten the packing nut, put the handle back on, restore water, and test.
If the faucet only leaks while a hose is attached, stop before tearing the faucet apart. The Environmental Protection Agency notes that hoses often leak at the connection point because the hose washer is worn or missing. Replacing that small rubber washer is faster than rebuilding a faucet that was not actually the problem.
Two small details matter here. First, hold the faucet body steady if the exterior body wants to twist while you loosen the stem. Second, do not overtighten the packing nut on reassembly. Too loose and it leaks; too tight and the handle becomes stiff and chews up the new packing faster.
The failed part is usually smaller than a thumbnail. That is why the moment the drip stops feels strangely larger than the repair itself.
Repair a Frost-Free Outdoor Faucet Without Missing the Hidden Failure Point
If your home sees real winter weather, this is the branch that makes people uneasy because the drip may not be stopping at the siding. A frost-free outdoor faucet can often be repaired by replacing the long stem washer and packing parts, but a leak inside the wall is the red flag that changes the job.
Seattle Public Utilities warns that frost-free valve stems can be more difficult to fix, especially if the leak is occurring inside the wall or if the stem is soldered to the supply line instead of threaded. That is the point where an otherwise normal DIY repair stops being a simple exterior job.
| Feature | Standard hose bib | Frost-free sillcock |
|---|---|---|
| Shutoff point | Near the exterior body | Several inches inside the wall |
| Stem length | Short | Long |
| Common failure | Bibb washer or packing leak | Stem washer, packing, or freeze split |
| Main risk | Visible exterior drip | Hidden leak inside the wall cavity |
When a Frost-Free Stem Repair Still Makes Sense
If the drip is visible only at the spout or handle and there is no sign of water inside the wall, a stem repair is still reasonable. Shut the water off, remove the handle, back out the packing nut, and pull the long stem assembly out carefully. Replace the washer at the end of the stem, inspect the packing area, grease the moving parts lightly, then reinsert the assembly and tighten it without forcing it.
The stem on a frost-free sillcock is longer than many people expect. Lay it on a towel in the same orientation it came out. If the end washer is cracked but the tube and threads look clean, a repair kit usually makes sense.
Signs the Leak May Be Inside the Wall Instead
Stop and reassess if any of these show up: water dripping indoors after the faucet runs, staining on an interior wall, a basement ceiling leak near the faucet line, or persistent dripping even after the exterior washer has been replaced. Those symptoms suggest the pipe or frost-free body may have split farther back, which is exactly what the frost-free design was supposed to prevent when winterizing is done correctly.
Freeze damage often starts when a hose is left attached through winter and trapped water cannot drain out of the barrel. The faucet still looks normal from outside, which is what makes this failure so deceptive. You shut the handle, hear less dripping, and assume it is fixed while the wall cavity keeps taking the hit.
That is the part homeowners rarely see coming. The outside hardware can look ordinary long after the real problem has moved a few inches back into the structure.
A frost-free faucet is supposed to push the vulnerable shutoff point deeper into the house. When it fails out of sight anyway, the unfair part is not the repair cost. It is how ordinary the faucet can look while the real damage sits a few inches behind the brick or siding.
Repair or Replace? Know When DIY Stops Paying Off
If you are standing in the hardware aisle comparing a washer pack with a full replacement sillcock, this is the decision point that matters. Repairing an outdoor faucet is still worth it when the body is sound and the problem is isolated to washers, packing, or a replaceable stem assembly.
| Condition | Repair still worth it? | Better move |
|---|---|---|
| Single handle leak around packing nut | Yes | Tighten or replace packing washer |
| Spout drip with intact stem and body | Yes | Replace bibb washer or repair stem |
| Heavy corrosion on stem, screw, or seat area | Maybe once | Prepare for stem or full faucet replacement |
| Leak keeps returning after recent repair | Usually no | Replace faucet or full stem assembly |
| Water leaking inside wall or from freeze split | No | Replace faucet and inspect the line |
| Stem is soldered in or access is poor | Sometimes not | Call a plumber before damaging the line |
The Environmental Protection Agency says that if step-by-step leak fixes are not enough to stop the problem, it may be time to replace the leaking fixture and consult a plumbing professional. That is a practical threshold. Washer repairs are cheap. Wall repairs are not. Once the risk shifts from visible drip to hidden damage, the economics change quickly.
Most people can live with buying a new faucet. What they hate is spending a Saturday trying to save one that was already past the point of reasonable repair.
Call a plumber sooner if you cannot isolate the water supply safely, if the faucet body moves inside the wall when you turn a wrench, or if the house has older piping that you do not want to stress. There is no prize for saving a small repair cost and creating a larger pipe repair in the same afternoon.
The expensive mistake is rarely replacing a faucet too early. It is trying to save a badly damaged one one more time after the leak has already stopped being an outdoor-only problem.
Frequently Asked Questions
Can I fix an outdoor faucet without shutting off the main water?
You can fix it without shutting off the whole house only if that faucet has a dedicated branch shutoff valve. If there is no local shutoff, turn off the main water supply before removing the handle or stem assembly.
Why does my outdoor faucet leak only when the hose is attached?
That usually means the hose washer at the connection is worn, flattened, or missing. Replace the hose washer first and retighten the hose before assuming the faucet body itself is failing.
How do I know if I have a frost-free outdoor faucet?
A frost-free faucet usually has a longer body, an angled spout, and a long stem that shuts the water off farther inside the house wall. Homes in colder climates are much more likely to have one.
Should I try tightening the packing nut first?
Yes, if the leak is around the handle, tightening the packing nut slightly is the best first move. If that does not stop the seep, replace the packing washer rather than forcing the nut tighter.
When does a leaking outdoor faucet mean water is getting inside the wall?
If you see indoor staining, hear dripping behind the wall after use, or keep getting leakage after repairing the exterior washer, treat it as a possible in-wall leak. That is especially important with frost-free faucets after freezing weather.
What to Do Next
Start with the leak location, not the wrench. If water is leaking at the hose connection, replace the hose washer. If it is around the handle, try the packing nut and packing washer. If it drips from the spout after shutoff, pull the stem and replace the washer at the end of the assembly. If the signs point inside the wall, stop early and shift from repair mode to damage control.
The job gets easier the moment the leak has a location and a name. Most outdoor faucet repairs are part-matching problems, not mysteries.
Last modified: May 27, 2026