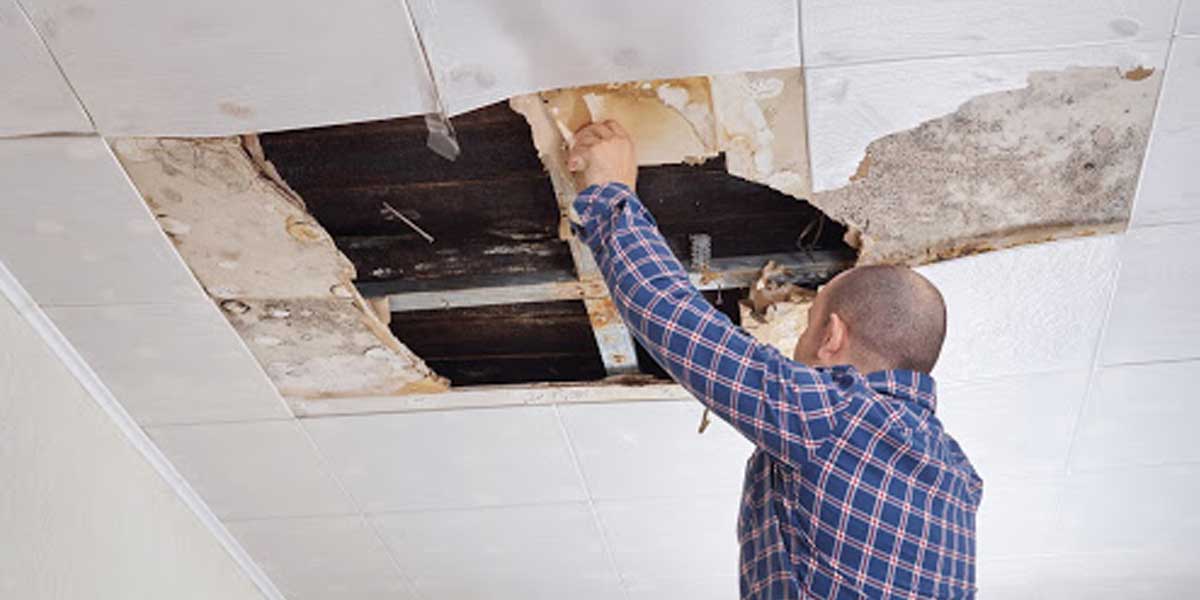
There are few things more anxiety-inducing for a homeowner than the steady drip, drip, drip of water during a rainstorm, or looking up to see a massive, expanding brown stain on your pristine living room ceiling. Your first instinct is probably to call a local roofing contractor immediately. But as many homeowners discover, finding a contractor willing to hunt down a minor, elusive leak can be surprisingly difficult, notes Liberty Real Estate Services professionals.
Because tracking down a small leak is incredibly time-consuming and often unprofitable compared to installing a brand new roof, you may find yourself forced to play detective. Fortunately, you do not need to be a roofing expert or have decades of construction experience to find the source of the water. You just need a bright flashlight, a tape measure, a logical process of elimination, and a little bit of patience.
Rule #1: Water Travels
The biggest mistake homeowners make when trying to diagnose a roof leak is assuming the hole in the roof is directly above the water stain on the ceiling. It almost never is. When water breaches the shingles, it hits the wooden roof decking or the rafters. Thanks to gravity and surface tension, it will run down the slope of the wood—sometimes for 10 or 15 feet—before it finally hits a joint, drops onto your attic insulation, and seeps through your drywall. To find the leak, you must always look uphill.
Real Homeowner Frustrations
If you are struggling to get a contractor to care about your leak, you are certainly not alone. Look at this exchange from a popular home improvement forum on Reddit, where a homeowner voiced their frustration:
“When it is raining, some water leaks from the inside of my door frame… roofers seemed to have a hard time finding where the water was from. Someone replaced part of my roof but the problem is not solved. A few roofers seemed not interested in spending time finding it.”
— u/beerbearbare, r/HomeImprovement
“If it’s not obviously a roof, a roofer at this point in time, isn’t going to waste time trying to find the leak when they could be making more money putting on new roofs… Finding this kind of leak sucks and then 75% of the time it’s happening because the framers didn’t tyvek properly or at all.”
— u/AbsolutelyPink & u/Heathhimself5, r/HomeImprovement
Step 1: Start Inside the House
Do not grab a ladder and climb onto the roof right away. The investigation always starts inside the living space. Go to the room with the active drip or the water stain. Take a tape measure and measure the distance from the center of the stain to two fixed reference points—usually the nearest exterior wall and an intersecting interior wall.
For example: “The center of the stain is 4 feet from the front window wall, and 6 feet from the hallway wall.” Write these measurements down on a piece of paper. You will use them in the attic to orient yourself, as everything looks completely different once you are up in the rafters.
Step 2: The Attic Investigation
Grab the brightest flashlight you own and head into the attic. Safety warning: Be incredibly careful to only step on the wooden joists. If you step on the drywall ceiling between the joists, you will fall right through into your living room.
- Find your spot: Use the measurements you took downstairs to locate the area directly above the ceiling stain.
- Look for the drop zone: Look down at the insulation. You should see a compressed, discolored, or wet area where the water has been dropping. If you have a plastic vapor barrier, push the insulation aside and look for water pooling on the plastic.
- Look Uphill: Shine your flashlight straight up to the wooden roof deck. Do you see a dark water stain on the wood? If so, follow that stain up the slope of the roof. Keep following the dark water trail until it stops. The highest point of that water trail is where the water is actually entering the house.
- Look for “Shiners”: Sometimes, the leak isn’t a hole in the roof at all. Look for roofing nails that missed the wooden framing and are poking straight through the wood into the attic (these are called “shiners”). In cold winter weather, warm, moist air from the house condenses on these cold nails and freezes. When the attic warms up during the day, the frost melts and drips, perfectly mimicking a roof leak. If you see frosted nails, simply clip them off flush with the wood using heavy-duty pliers.
Once you find the exact entry point on the underside of the roof deck, measure its distance from a visible landmark like the chimney, a vent pipe, or an exterior wall. This will tell you exactly where to look when you finally go outside.
Step 3: The Garden Hose Trick
If your home does not have an attic, if the attic is inaccessible, or if the water trail is impossible to see due to thick insulation, you have to recreate the rainstorm to find the leak. You will need a helper for this step.
- Wait for a completely dry, sunny day. Never climb onto a wet, slippery roof.
- Have your helper stay inside the house, standing directly under the ceiling stain with a cell phone.
- Take a garden hose up to the roof. Go to the general area you suspect is leaking based on your interior measurements.
- Start Low: Do not spray the whole roof at once, or you will never isolate the leak. Start at the bottom of the suspected area and run the hose over a small, isolated 3-foot section. Let the water run for a full 2 to 3 minutes.
- Move Uphill Slowly: If your helper doesn’t yell that they see water dripping, move the hose up a few feet and soak the next section. For example, if you are testing a chimney, soak the downhill side for 3 minutes, then the left side, then the right side, then the top.
- When your helper finally yells, you know the exact component you are currently watering is the source of the leak.
The 4 Most Common Leak Sources
When you are up on the roof looking for the culprit, pay special attention to these four areas. It is incredibly rare for a leak to develop in the middle of a field of uninterrupted shingles; leaks almost always happen at penetrations and joints.
- Plumbing Vent Boots: Look at the white or black PVC pipes sticking out of your roof. They are sealed with a rubber and metal “boot.” Over 10 to 15 years, the sun bakes this rubber, causing it to crack, tear, or rot away completely. Water runs right down the side of the pipe into the house.
- Failed Flashing: Check the metal strips around your chimney, skylights, and dormer walls. If the metal is rusted through, bent upward by wind, or if the caulking around it is cracked and peeling, water is getting behind it.
- Roof Valleys: The V-shaped crease where two roof slopes meet channels massive amounts of water during a storm. If the shingles here were not trimmed correctly, or if the metal valley flashing has corroded, it is a prime spot for leaks.
- Missing or Damaged Shingles: Look for shingles that are cracked, curled upward at the edges, or missing entirely due to wind damage. Also look for exposed, rusty roofing nails where the shingle above it has broken away.
Frequently Asked Questions (FAQ)
Caulk and aerosol sealants are temporary band-aids. They will dry out and crack within a year or two under the intense UV rays of the sun. A permanent fix requires a “mechanical” repair—meaning you must replace the damaged shingles, install a new rubber vent boot, or replace the rusted metal flashing entirely.2. Why does my roof only leak during heavy, blowing rain?
Wind-driven rain can push water upward, defying gravity. It can blow water backward under your shingles, or force it sideways into the siding and corner boards of dormer windows. If your roof only leaks during severe storms, check the caulking on your siding and windows above the roofline.3. How much does it cost to fix a minor roof leak?
If the repair is localized (like replacing a single vent boot, patching a few shingles, or resealing a chimney), you can expect to pay a professional roofer between $200 and $500. If you do it yourself, the materials usually cost less than $50.4. Will my homeowner’s insurance cover a roof leak?
It depends on the cause. If a tree branch fell and punctured the roof, or a severe windstorm ripped the shingles off, insurance will typically cover the repair and the interior water damage. If the leak is caused by old age, wear and tear, or lack of maintenance, insurance will deny the claim.5. What should I do if I have a vaulted ceiling with no attic?
Vaulted ceilings make finding leaks very difficult because you cannot see the underside of the roof deck. In this scenario, you must rely entirely on the garden hose trick on the exterior of the roof. If that fails, a professional roofer may need to use an infrared thermal imaging camera to detect the moisture hidden behind the drywall.
Conclusion
Finding a roof leak can feel like looking for a needle in a haystack, but by remembering that water always travels downhill, you can usually trace the path back to the source. Start in the attic, measure carefully, and use the garden hose trick to isolate the problem. Once you find the cracked vent boot or the rusted flashing, you can either confidently hire a professional to fix that specific spot, or tackle the repair yourself. Tracking down moisture can be a complex process, especially when a small drip travels along a rafter before finally appearing on your ceiling. Evaluating these issues early helps protect the building structure from rot and prevents costly deterioration over time. Homeowners often benefit from consulting a roofing contractor serving Chambersburg PA to perform a comprehensive evaluation of the roof’s exterior layout. An experienced specialist can inspect critical flashing details, check shingles for hidden wind or storm wear, and make sure any baseline vulnerabilities are resolved to ensure long-term durability and safety.
Last modified: June 16, 2026